Step by Step : SQL Account or Payroll – Network Setting #
Session 1 : Install Firebird Version #
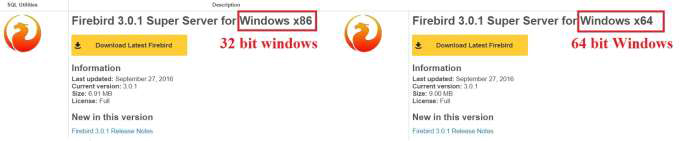
Visit http://www.sql.com.my/support/downloads to download firebird version.
Step 1: Install Firebird 3.0 version or higher. If Window System Type is 64 Bits, please download Firebird 3.0- 64 Bits
Step 2: Run Firebird setup.
Step 3: Press Ok.
Step 4: Select ‘I accept the agreement’.
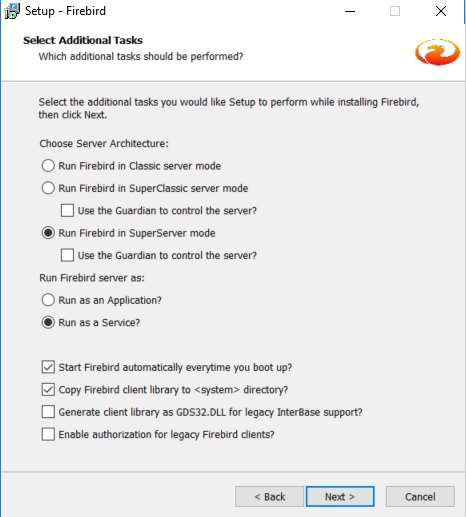
Step 5: Click 5 times ‘Next’.
Step 6: Make sure it is Run Firebird in SuperServer Mode.
Step 7: Leave it blank to use default password of masterkey.
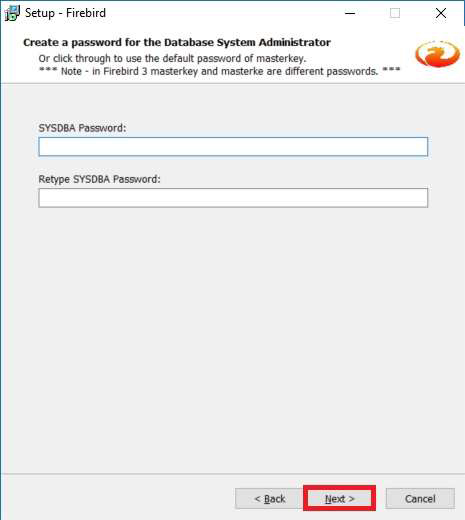
Step 8: Click on Next > Install > Next > Finish to complete.
Session 2 : Window Firewall #
Step 1: Go to Control Panel > Window Firewall > Advanced Settings > Inbound Rules > New Rules.
Step 2: Select Port > Next > TCP > Specific Local Port = 3050 > Next > Next > Next.
Step 3: Name = Firebird, then click on ‘Finish’.
Session 3 : Network and Sharing Center #
Step 1: Go to Control Panel > Network and Sharing Center > Change Advanced sharing Settings.
Step 2: Network Discovery > turn on Network Discovery.
Step 3: File and Printer Sharing > Turn on sharing so anyone with network access can read and write files in the public folders.
Step 4: Public Folder Sharing > Turn on Sharing so anyone with network access can read and write files in the Public folders.
Step 5: File Sharing Connection > Use 128-bit encryption to help protect file sharing connections (recommended).
Step 6: Password protected Sharing > Turn off password protected Sharing.
Session 4 : Share the SQL Account or Payroll Folder #
Step 1: Open My Computer > Go to C:\eStream\SQLAccounting\Share or Go to C:\eStream\SQL Payroll\Share > Right Click > Properties.
Step 2: Go to Sharing Tab > Advanced Sharing > Tick ‘Share this Folder’ > Click Permissions > Tick ‘Full Control’ > Press OK > Ok.
Step 3: Click on Security Tab > Click Advanced > Click on Change Permissions > Click Add Button > At empty Box enter: Everyone > Press OK > Tick Allow Full Control > Press OK > OK > OK > OK.
Session 5 : Install SQL Account or Payroll #
Step 1: Run SQL Account or Payroll Setup > Click Next > Choose ‘I Select the Agreement’ > Click Next.
Step 2: Amend to C:\eStream\SQLAccounting or C:\eStream\SQL Payroll > Click Next 3 times > Install > Click Finish.
Step 3: Create Group > Click DCF Group > Click ‘save’ Button.
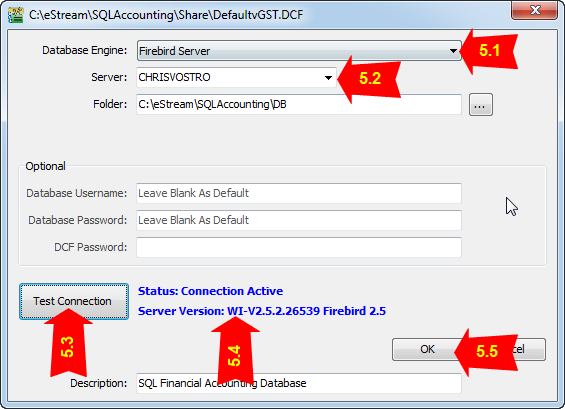
Step 4: Database Engine = Firebird Server > Click Test Connection. If the status shown in blue color, press OK.
Note: Please take note of antivirus program. Have to add exception at Firewall.
Session 6 : Client PC Setting #
Step 1: Run SQL Account or Payroll Setup > Click Next > Choose ‘I Select the Agreement’ > Click Next 4 times > Install > Click Finish.
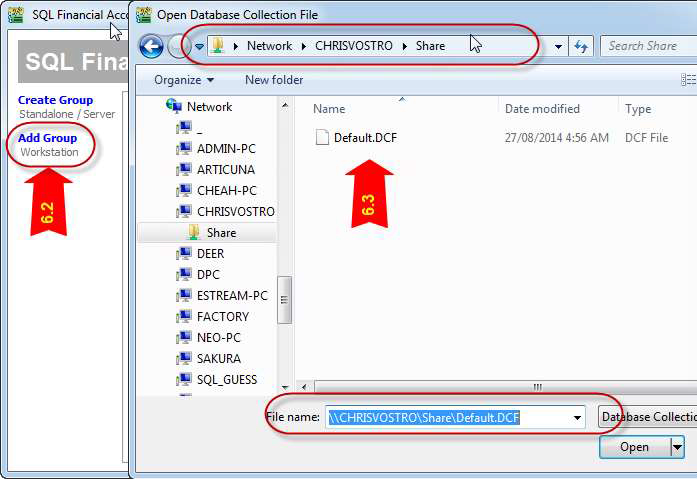
Step 2: Add Group > Click DCF File.
Step 3: Select Share folder (At Session 4) > Select Default DCF.

Step 4: Click on Firebird icon and Logon as usual.
For Original Guide (PDF): Click Here
Credits: SQL


