Problem #
SQL Server Database Administrators often face the task of moving user database files to a new location. The reasons for these changes can be separating the location of the log and data files, moving files to a new disk due to a shortage of storage, distributing files between several disks in order to improve performance, and so on. In this tip, we are going to describe the process of moving a SQL Server user database’s files to a new location within the same instance.
Solution #
Let’s assume we have a SQL Server database and we want to move its data and log files to a new location. Additionally, the database should remain in the same instance and nothing should be changed logically. Only the database files should have a new physical location.
The following example creates a sample database:
USE master
GO

CREATE DATABASE TestDB
GO

USE TestDB
GO

CREATE TABLE TestTable
(
ID INT,
Val CHAR (1)
)
INSERT INTO TestTable(ID, Val)
VALUES (1,'A'), (2,'B'),(3, 'C')
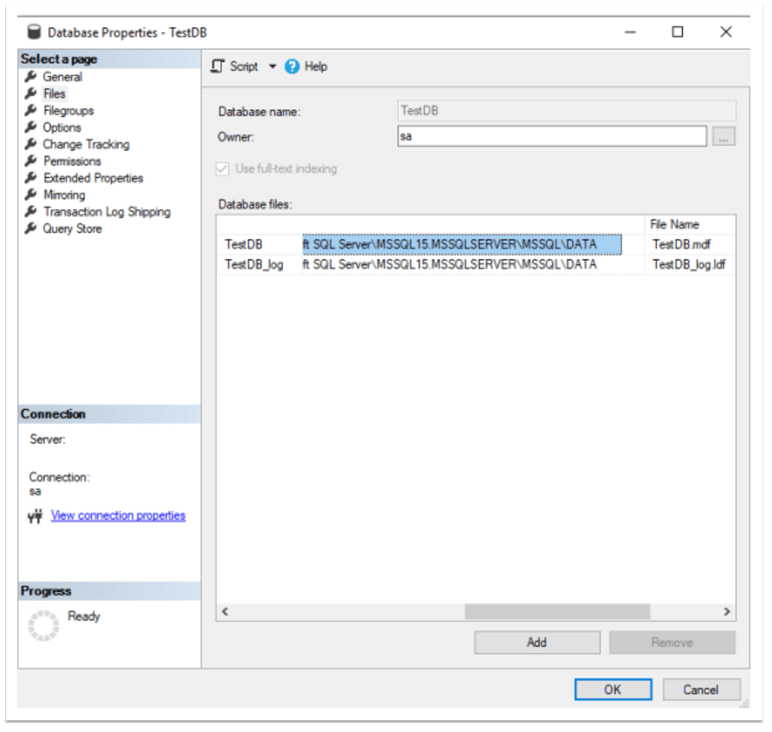
As it is not mentioned in the database creation script, the database’s data and log files are created in the default location. We can see that by right-clicking on the database name in SQL Server Management Studio (SSMS) and choosing “Properties” then “Files” as shown below:
This information can be obtained by running the following query:
SELECT name AS FileLogicalName, physical_name AS FileLocation
FROM sys.master_files
WHERE database_id = DB_ID(N'TestDB')
We can see the files logical names and physical locations:

Suppose we have specific folders for our data and log files (“C:\MSSQL\UserDBData” and “C:\MSSQL\UserDBLog” correspondingly) and we need to move these files to the corresponding locations. This process should not affect other databases in the instance and all other databases should be available during this relocation. Let’s start the process.
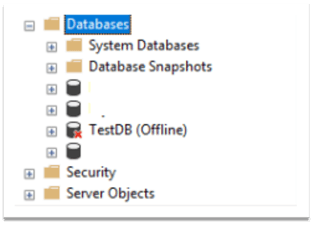
First, we need to take the database offline. To do that, use the code below:
USE master
GO

ALTER DATABASE TestDB SET OFFLINE
After running this code, we can see that TestDB is now in the offline state:
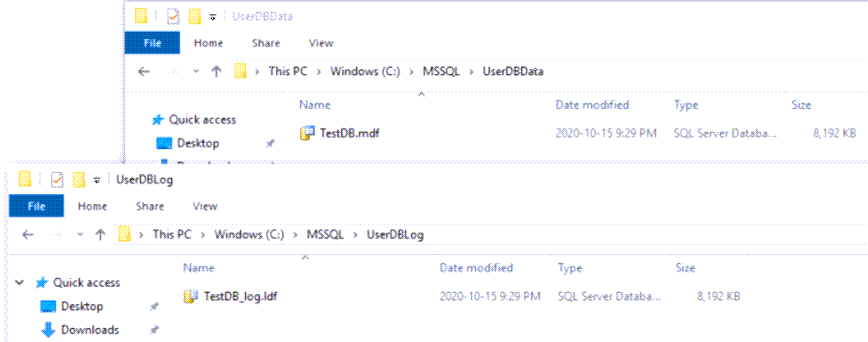
Then, we physically move the data and log files to new locations:
The next step is to ALTER the database to use new paths of its files:
USE master
GO

ALTER DATABASE TestDB
MODIFY FILE (NAME = TestDB, FILENAME = 'C:\MSSQL\UserDBData\TestDB.mdf')

ALTER DATABASE TestDB
MODIFY FILE (NAME = TestDB_log, FILENAME = 'C:\MSSQL\UserDBLog\TestDB_log.ldf')
Note: In the code above, “NAME” is the logical name of the file and “FILENAME” is the new path of the file. This should be done for all the files that we want to relocate.
After executing the code, we can see that the modification has been successfully completed and the new path will be used when the database is started:

Now, it is time to bring the database online (it is important to mention that the necessary permissions to the new folders are required to bring the database online):
USE master
GO

ALTER DATABASE TestDB SET ONLINE
In SQL Server Management Studio, we can see that the database is online and the files’ paths are updated:
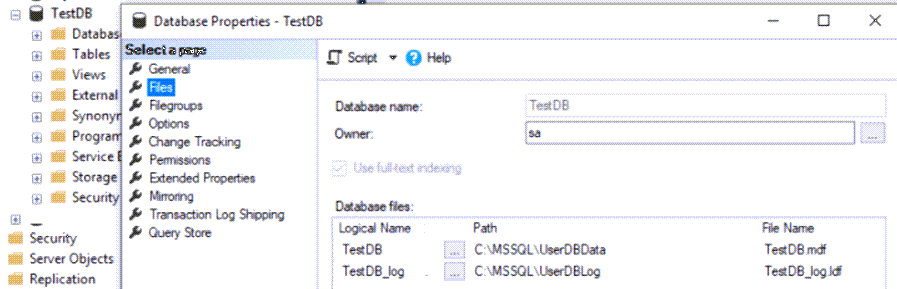
We have successfully moved the data and log files to the new location.
Credits: MySQLTips
Related Posts: SQL Account System Requirements


