Table of Contents
This article demonstrates how to set up the Vigor Router as an SSL VPN gateway to allow Internet clients, especially Windows PC, to access the local network by an SSL VPN tunnel. In the article, we show the configuration required for the router, as well as how to start the SSL VPN connection from a PC using Smart VPN Client, the free VPN client app provided by DrayTek.
Setup on Vigor Router #
- Make sure the router is connected to the Internet and has a public WAN IP address so that VPN clients on the Internet can reach it.
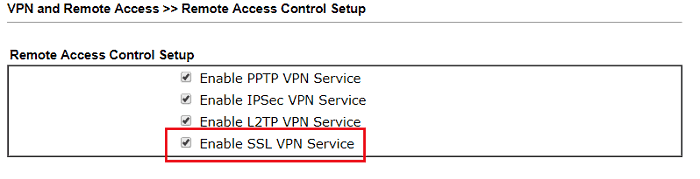
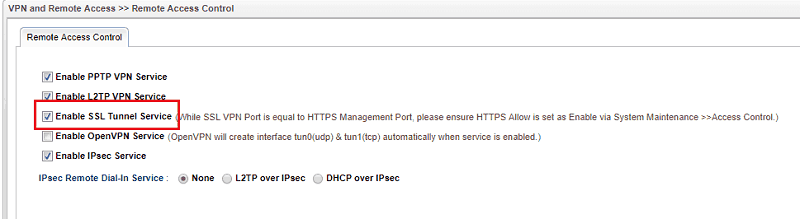
- At VPN and Remote Access >> Remote Access Control, make sure “SSL VPN Service” is enabled.
- Create user profiles for SSL VPN clients. Go to VPN and Remote Access >> Remote Dial-in User. add a profile as follows:
- Check “SSL Tunnel” for Allowed Dial-In Type.
- Enter Username and Password.
- Click OK to save the profile.

SSL VPN Setup on Windows
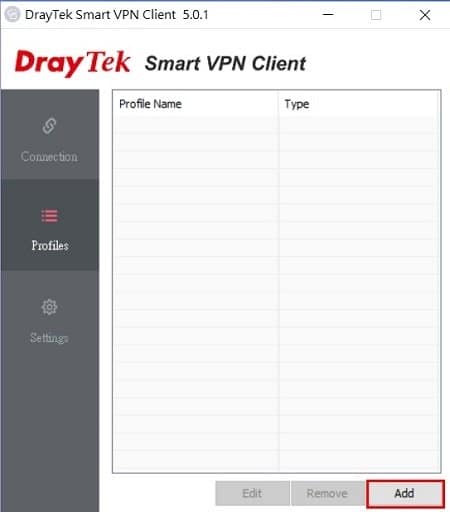
- Launch Smart VPN Client, click Add to create a new VPN profile.
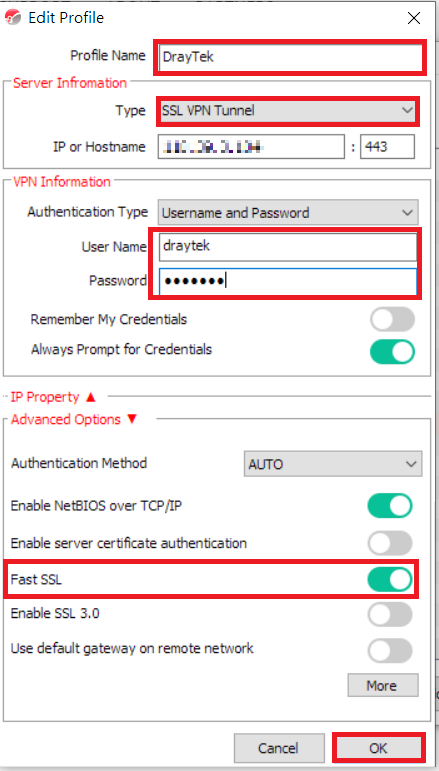
- Configure the VPN Profile as follows:
- Enter Profile Name
- Select “SSL VPN Tunnel” in Type
- Enter Vigor Router’s WAN IP in IP or Hostname
- Enter User Name and Password
- Enable Fast SSL
- Click OK
- Initiate the VPN by selecting the VPN Profile and swift to Connect.
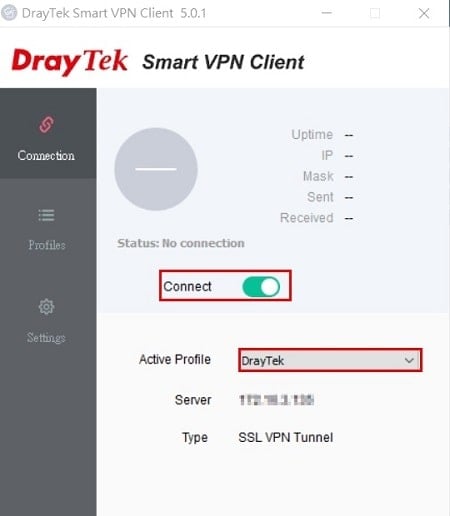
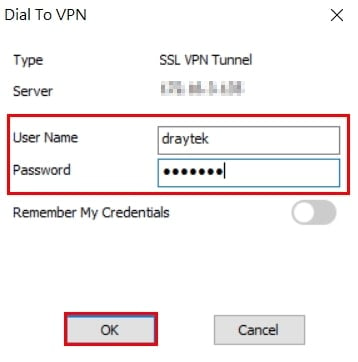
- Confirm User Name and Password, and click OK to start the SSL VPN connection to Vigor Router.
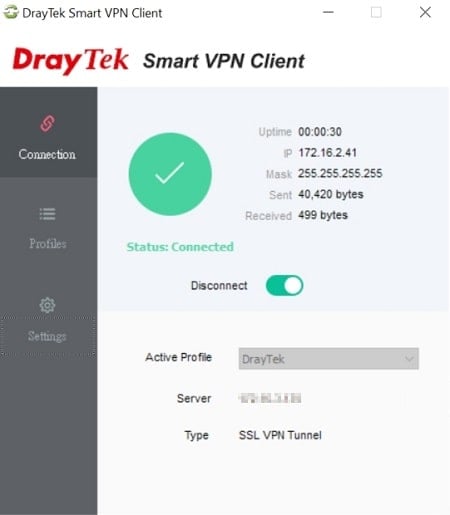
- The status will show “connected” once the connection established.
- Make sure the router is connected to the Internet and has a public WAN IP address so that VPN clients on the Internet can reach it.
- At VPN and Remote Access >> Remote Access Control, make sure “SSL VPN Service” is enabled.
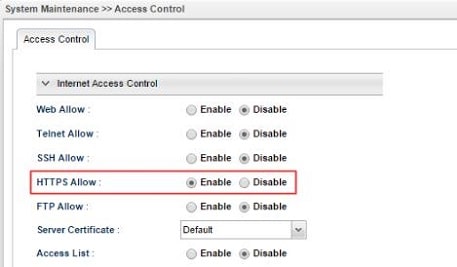
- If SSL VPN port and HTTPS port are the same, make sure HTTPS Allow is enabled at System Maintenance >> Access Control.
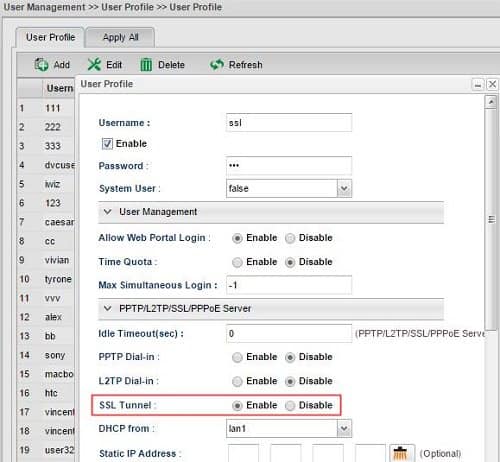
- Create user profiles for SSL VPN clients. Go to User Management >> User Profile, and click Add.
- Check Enable
- Type Username and Password
- At PPTP/L2TP SSL Server, select “Enable” for SSL Tunnel
- Click Apply to save the profile.
SSL VPN Setup on Windows
- Launch Smart VPN Client, click Add to create a new VPN profile.
- Configure the VPN Profile as follows:
- Enter Profile Name
- Select “SSL VPN Tunnel” in Type
- Enter Vigor Router’s WAN IP in IP or Hostname
- Enter User Name and Password
- Enable Fast SSL
- Click OK
- Initiate the VPN by selecting the VPN Profile and swift to Connect.
- Confirm User Name and Password, and click OK to start the SSL VPN connection to Vigor Router.
- The status will show “connected” once the connection established.
Download #
Smart-VPN
Credit By : Webstation


