Table of Contents
Remote Desktop Network Printer Redirection Workaround #
- Click on the Start button and open Control Panel then open “Devices and Printers”.
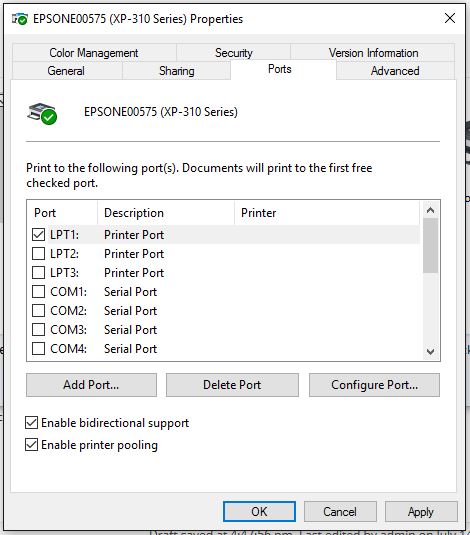
- Right click on the network printer that needs to be redirected and choose “Printer Properties”.
- Click on the Ports tab and put a check next to “Enable printer pooling” and next to the “LPT1:” in the list then click the OK button to finish.
- Click on the Start button and open Remote Desktop Connection then click on the “Local Resources” tab.
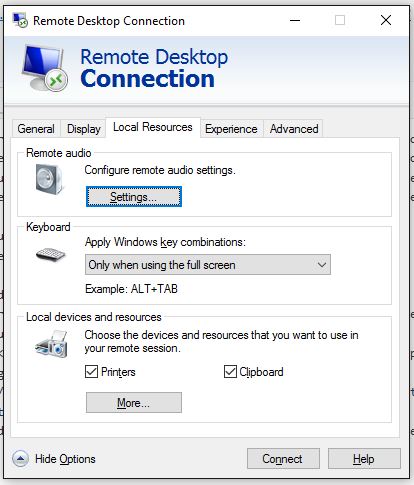
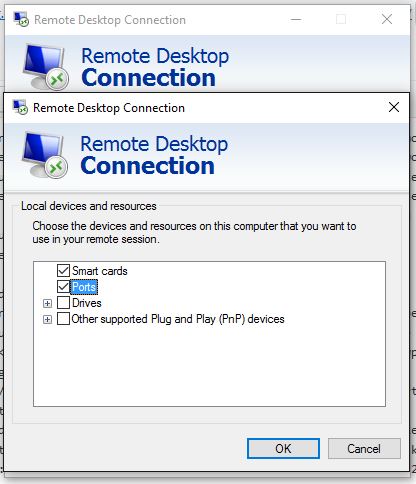
- Click on the “More…” button at the bottom then put a check next to the Ports item then click the OK button.
- Make sure to go back to the General tab and click on save before clicking on the Connect button.
- Once connected download and install the needed print driver but do not create the printer itself yet.
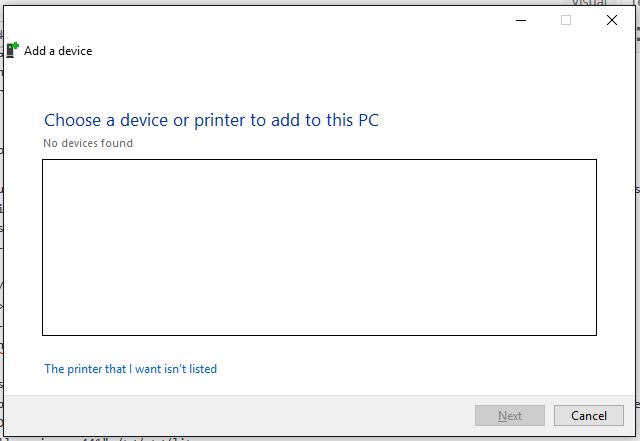
- Inside the Remote Desktop connected computer click on the Start button and open Control Panel then open “Devices and Printer”
- Click on the Add Printer button at the top then click on the “The printer that I want isn’t listed” link at the bottom of the window that opens.
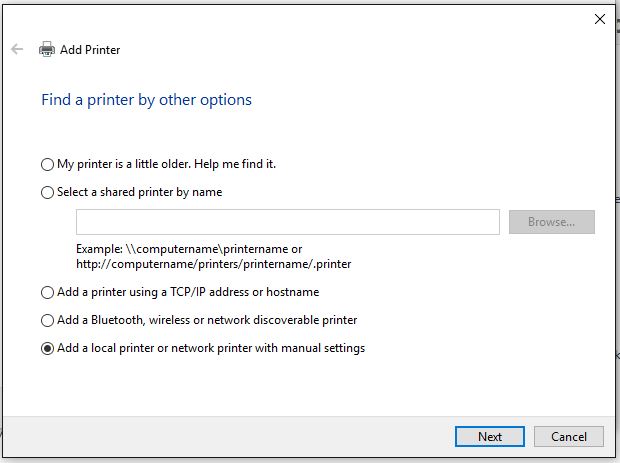
- Click on the radio selection next to “Add a local printer or network printer with manual settings” then click on the next button.
- Click on the list “Use an existing port” and choose “TS001:” which usually corresponds to the LPT1: port redirection, but it may take some trial and error going through this list later to figure out which one it is.
- Search through the list of drivers to pick the one associated with the one being connected then click on the Next button.
- If requested, choose to “Replace the current driver” and click on the Next button.
- Change the name as needed and click on the Next button.
- Choose “Do not share this printer” and click on the Next button.
- Test the printer by clicking on “Print a test page” then click the Finish button.
If the printer does not print then open the printer properties on the Remote Desktop connected computer and change the port to TS002: on the Ports tab, click Apply then click “Print a test page” on the General tab to test again. Repeat down the list until the correct port is found.
Credits: FarmHouse


