How to Use Inventory Forecasting #
Update Safety Stock and Lead Time #
Step 1: Go to Inventory menu and navigate to All Inventory Items.

Step 2: Edit the Item.

Step 3: At Item Info, fill in the Safety Stock and Lead Time of the item.

Step 4: Save the Item after changes made.
![]()
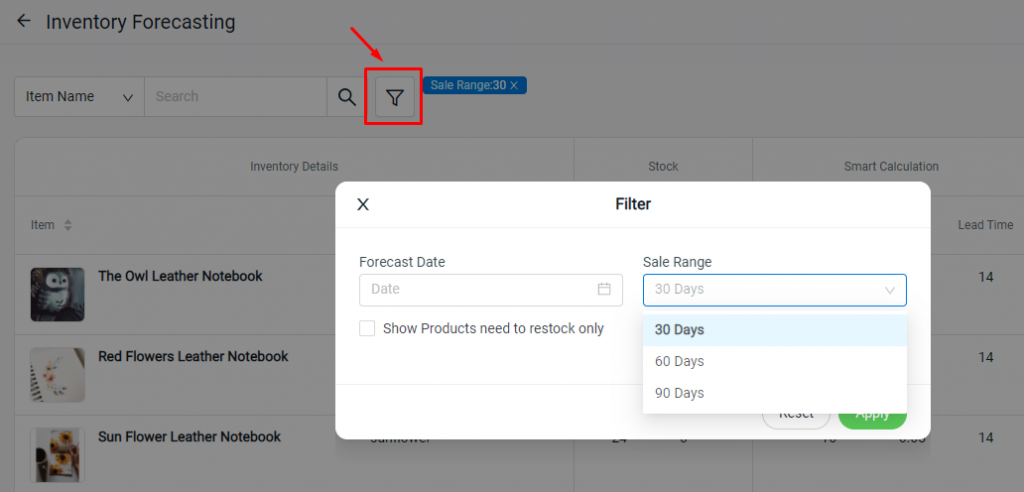
View the Forecasting Result #
Step 1: Go to Inventory Adjustment from Inventory Menu.

Step 2: Click into Inventory Forecasting.

Step 3: From the Filter, you may select the Sales Range: 30 / 60 / 90 days.
Step 4: The result after the filter will then be shown. The column where it is shown in Red Highlight will be the product that needed to be replenished.
Note: Click on the information icon ⓘ to view the Purchase Order (P.O.) details.

Calculation:
Sale/Day = Quantity Purchased ÷ Sale Range
Without P.O. = In Hand Stock ÷ Sale/Day
With P.O. = [In Hand Stock + Stock On P.O] ÷ Sale/Day
Additional Information #
1. Show Products Need to Restock Only
Filter with option “Show Products need to restock only” status enabled. Hence, it will only show the product list where it required to be restock.


2. Forecast Date
Filter a Forecast Date to check whether the stock will still able to last if the forecast date is reached.

The column where it is shown in Red Highlight and Wording will be the product that needed to be restocked before the Forecast Date.
For example: The product estimated to be last 100 days from today, and you filtered the forecast date which is 100 day later. Then the result will be shown as below:

For Latest Guide: Click here
Credits: SiteGiant Lite


