How to Manage Your Webstore Layout #
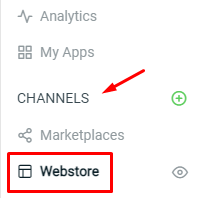
Step 1: From the Dashboard, go to the Webstore menu.
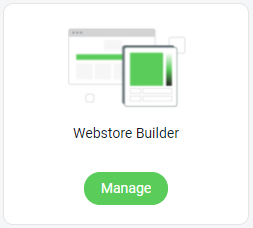
Step 2: Click ‘Manage’ on Webstore Builder.
Step 3: From the ‘Theme’, you are able to customize the style and design of your webstore.
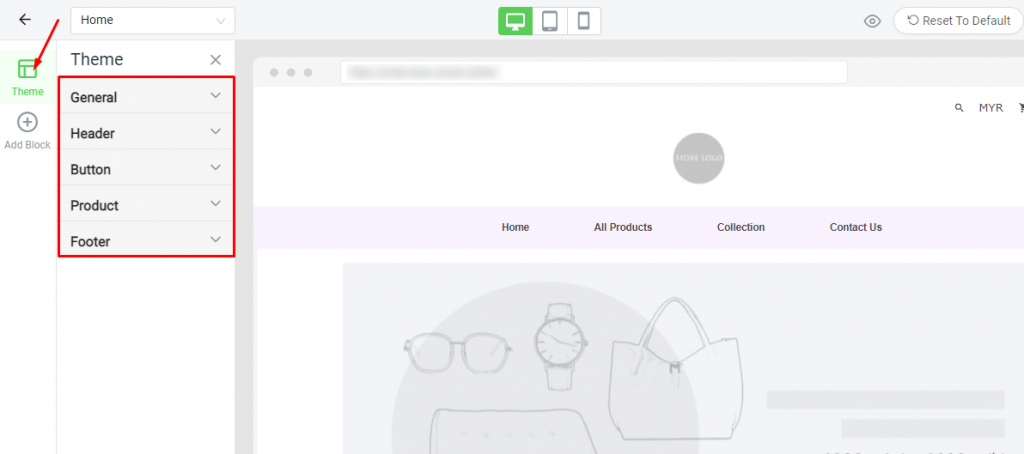
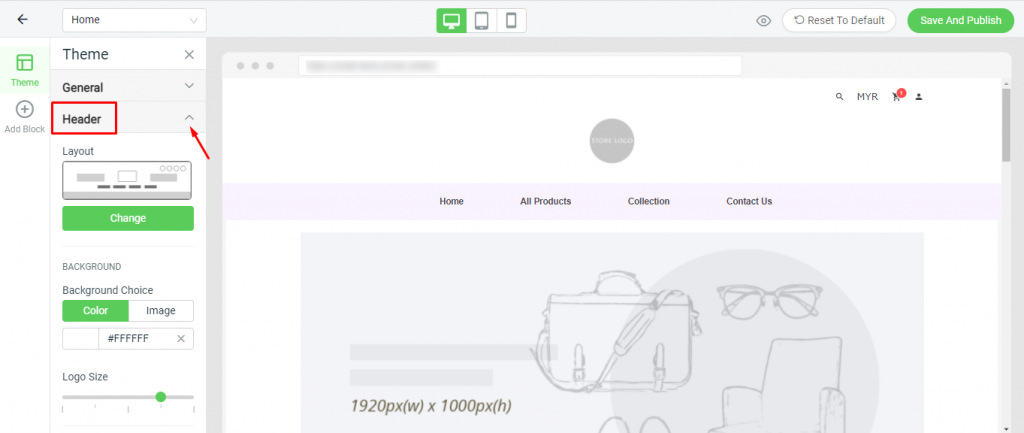
Step 4: Click into each Theme Menu (General, Header, Button,…) to customize the layout, text format, button color and etc.
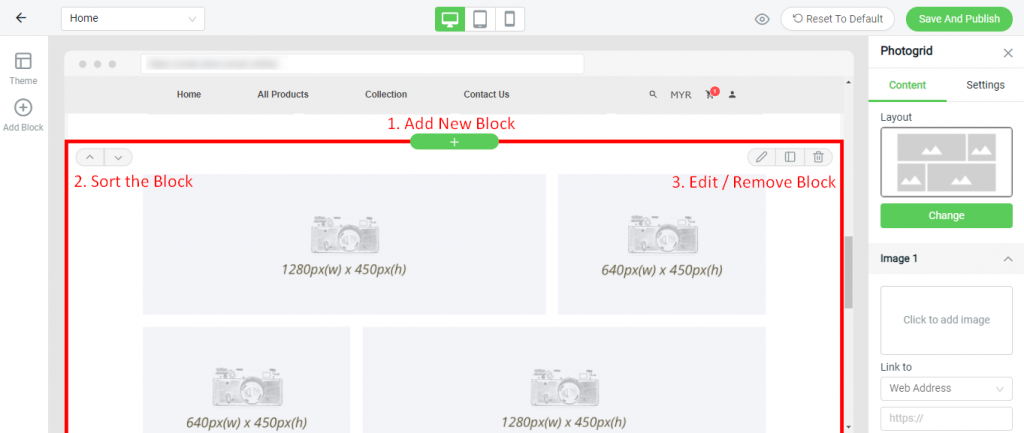
Step 5: Click on the ‘Add Block’ to add on more content to the webstore page.

Step 6: You are able to:
– Add a new block with the (+) button.
– Sort and arrange the sequence of blocks.
– Edit or remove the block.
Step 7: Remind to click ‘Save And Publish’ button to apply the changes.

Step 8: Click on the ‘View Webstore’ to check your webstore design in the web browser.

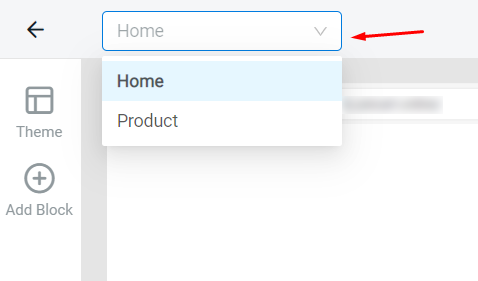
Step 9: From the top-left corner, you are able to choose the view of ‘Home’ or ‘Product’ page design.
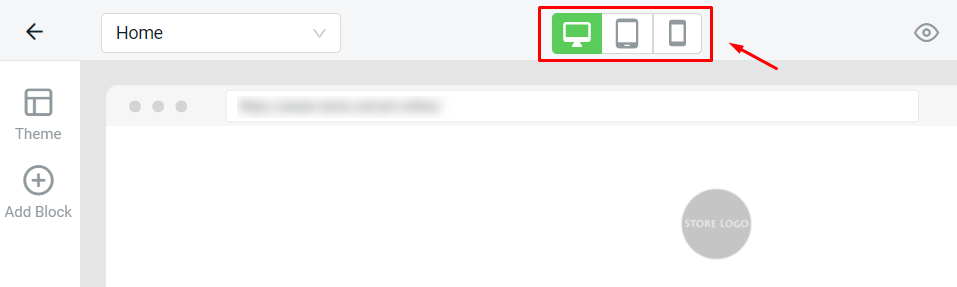
Step 10: You can also preview the outcome in desktop, tablet and mobile view.
Step 11: If you are not satisfied with the design, you can click ‘Reset To Default’ and all settings will be reset to the default theme.

For Latest Guide: Click here
Credits: SiteGiant Lite


