How to use the Barcode Label #
Barcode Label Settings #
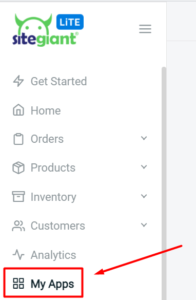
Step 1: Navigate to My Apps on the menu dashboard.
Step 2: Select the Barcode Label app.

Step 3: There will be a list of barcode label sizes available. Decide on the size you’ll like to print and click on ‘Set As Default’ button to pick the size.

Step 4: For more settings of the barcode label, click on the edit icon.

Settings Information
Step 1: Customization of the SKU Barcode/QRcode label.

Step 2: Select sample data to test preview and print

Step 3: Click on the Save button to keep all the customizations you have set.

Print Barcode Label #
Step 1: Navigate to Inventory > All Inventory Items.

Step 2: Select the product SKUs you’ll like to print the barcode and click on Print Barcode.

Step 3: Click on Yes, Confirm to view the list of barcodes for printing.

Step 4: In the list of barcodes, click on the Barcode icon to print.

Step 5: A preview will pop up. If it’s ready to print, click on the Print Barcode button to proceed.

For Latest Guide: Click here
Credits: SiteGiant Lite


