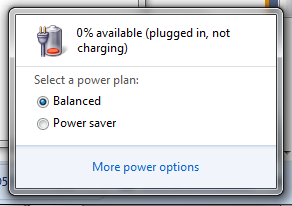
How to Fix a Laptop That Won’t Charge #

Here are some of reasons: #
- A faulty adapter cable could not be provide enought power to the laptop.
- Charger and battery is quite old.
- An issue with the power inlet of the computer.
- Battery driver is outdated.
Perform some basic check: #
- Make sure that laptop plugs and AC outlet is at it place.
- Check if there is any damage to the charger adapter or cable.
- Make sure that there is no dust particles inside the charging port.
- If the laptop is overheating then remove the battery, leave it for few minutes and then put it back.
Solutions #
Troubleshoot Hardware Issue #
Here is the way to troubleshoot various hardware issue that could be causing the charger not to work:
Step 1: Plug the laptop charger into different power outlets of the place where you are using the computer and see if charges. If yes, then there is something wrong with your room’s power outlet. If no, then check the power cables and see whether they are faulty or not.
Step 2: Remove the battery of the laptop from its respective compartment and connect it again after a few minutes. Connect the charger with the laptop and see if the charging LED of the laptop lights up or not.
Power Reset your Laptop #
The power reset solves most of the laptop issues. Sometimes the device needs a tuneup, and the power reset brings that to the table. Here is the method to hard reset the laptop:
Step 1: Shutdown the laptop and remove the laptop’s battery after shutting it down.
Step 2: Keep holding your laptop’s power button for 30 seconds and then release it.
Step 3: Put the battery back into its compartment and start your laptop.
Step 4: Connect the charger as well and check whether the computer is charging or not.
Update Battery Driver #
You can fix it by update the battery’s driver through the Windows Device Manager utility and here are the steps to do that:
Step 1: Open Device Manager by typing the name on the Windows search bar.
Step 2: Locate “Batteries” from the list and double click on it.
Step 3: Right-click on your battery’s driver and click on “Update Driver” before proceeding to the next step.

Step 4: Click on “Search automatically for updated driver software” for the interface to update.

Step 5: Wait for a while as the driver will get updated, close the window, and restart your laptop before plugging the charger into it.
Update your BIOS #
Updating the BIOS may fix several other issues, including the laptop not charging problem as well, but you would have to be very careful while performing it. Here are the steps to update the BIOS of the laptop:
Step 1: Copy the relevant BIOS file to a USB.
Step 2: Click on the power button from the Start menu and hold the “Shift” key while clicking on the “Restart” option.
Step 3: You will see some options in front of a blue background, click on “Troubleshoot” and proceed.
Step 4: From the “Advanced Options,” click on “UEFI Firmware Settings”.
Step 5: Click on “Restart,” and the laptop will start to boot to BIOS.
Step 6: Follow the instructions after selecting to update the BIOS to complete the process.
Credits: David Darlington


