Table of Contents
How to Perform Stock Adjustment with Excel #
Step 1: Go to Inventory Adjustment from the Inventory menu.

Step 2: Then, click into the Stock Adjustment.
Step 3: Click on the More(…) button at the right-top and select ‘Import Stock Adjustment‘.

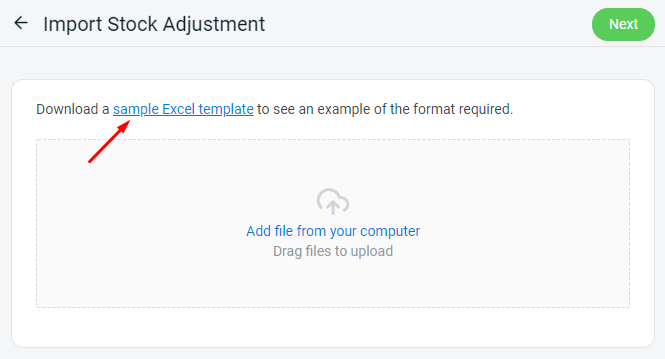
Step 4: Download the sample Excel template for Stock Adjustment.
Step 5: Fill in the details for item stock adjustment.

1. warehouse_name: Your warehouse which can get from Inventory > Warehouses.
2. reason: Choose one of the reasons stated. (New Products / Returned / Stock Adjustment / Transfer / Others)
3. isku: The iSKU of the Item in your Inventory.
4. rack: If there are rack set for your item, you may insert the rack name.
5. quantity_changed: The stock level that you wish to adjust (+/-).
6. available_stock: Adjust the total In-hand stock of the item.
Note: Set either one, for quantity_changed or available_stock field. Else, the system will update based on the quantity_changed.
Step 6: Next, upload your excel file and click ‘Next‘ to continue.

Step 7: Click on the ‘Proceed‘ button if there is no error.

Step 8: System will notify for the successfully imported data, then click on ‘Done‘.

For Latest Guide: Click here
Credits: SiteGiant Lite


