How to Print Lazada Shipping Label #
Configure Lazada Shipping Label Setting #
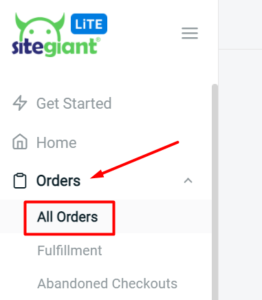
Step 1: Navigate to Orders > All Orders on the menu dashboard.
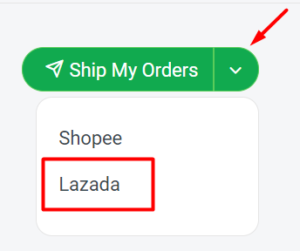
Step 2: Click on the ‘Ship My Orders’ button and choose Lazada.
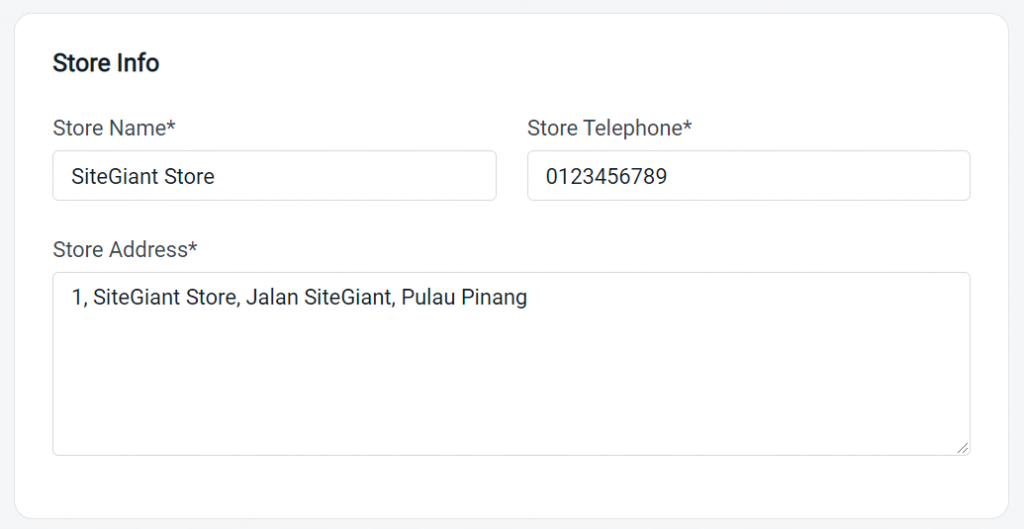
Step 3: Complete the Store Info by inserting Store Name, Store Telephone and Store Address.
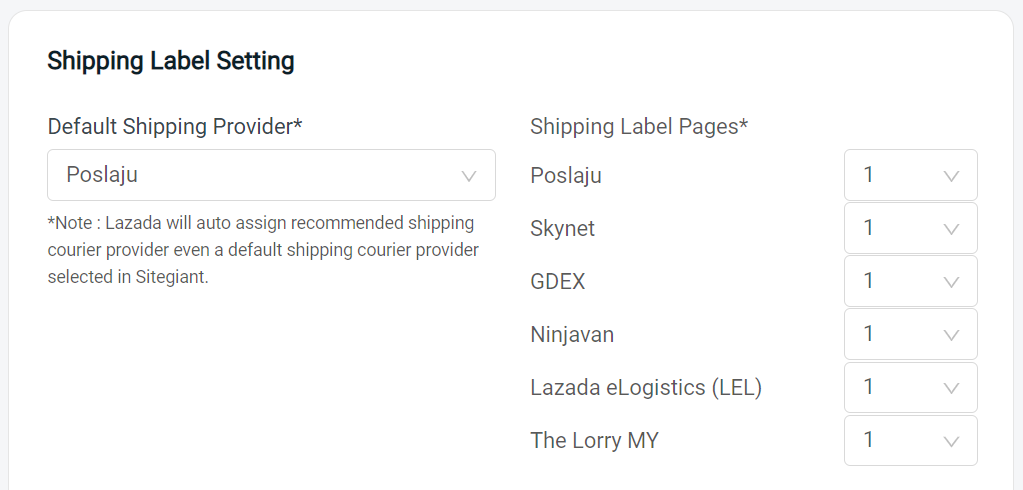
Step 4: Choose a Default Shipping Provider, and select the number of Shipping Label Pages to be printed for each courier service.
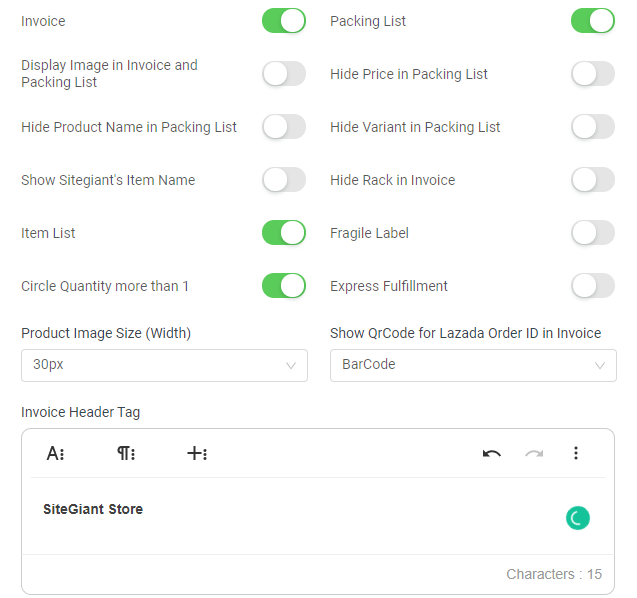
Step 5: Configure the Shipping Label Printing settings.
Step 6: Once done with all the settings for your Lazada Shipping Label, click on the ‘Save’ button.

Set Status to Packed #
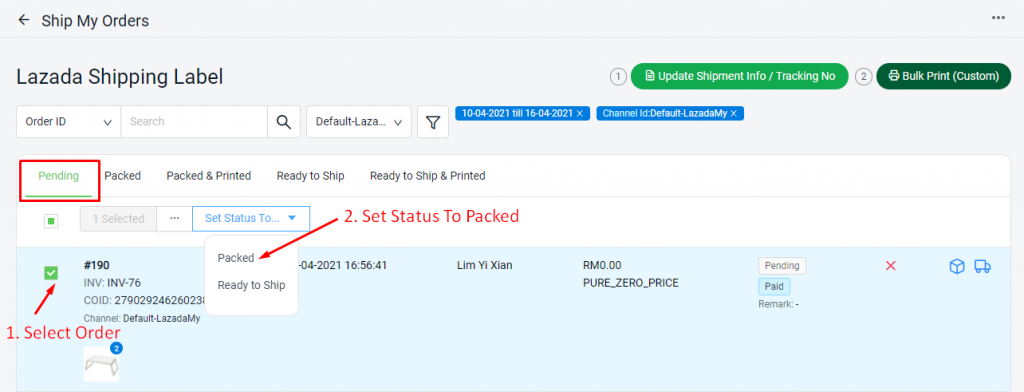
Step 1: Under the Pending section, select the pending orders, and choose ‘Set Status to…’ at (…). Then, select the status as ‘Packed’.
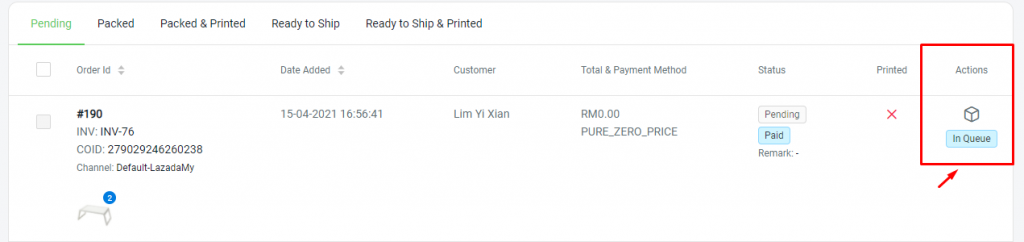
Step 2: Once the order status is set as Packed, the order status under Actions column will be showing ‘In Queue’ and the order will be auto-updated to the Packed page shortly after.
Print Lazada Shipping Label #
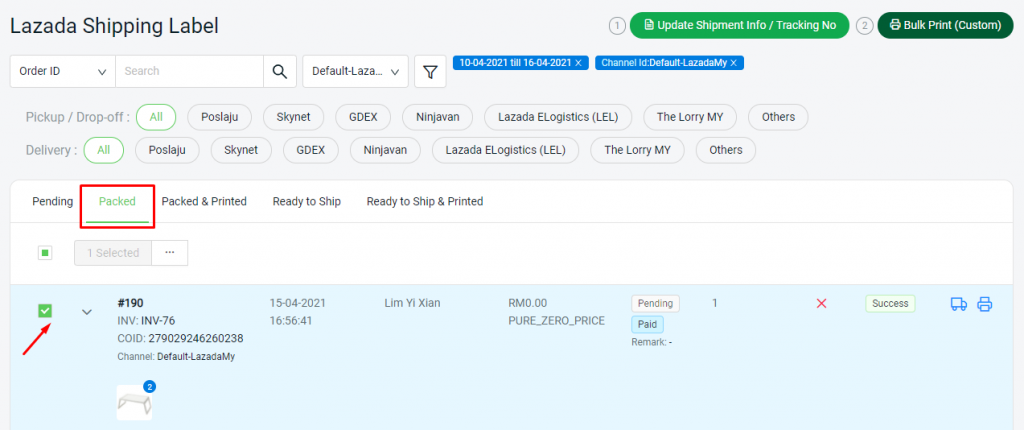
Step 1: Under the Packed tab, you will be able to view and select all orders from every Shipping Service Provider by picking the ‘All’ option or pick the option accordingly.
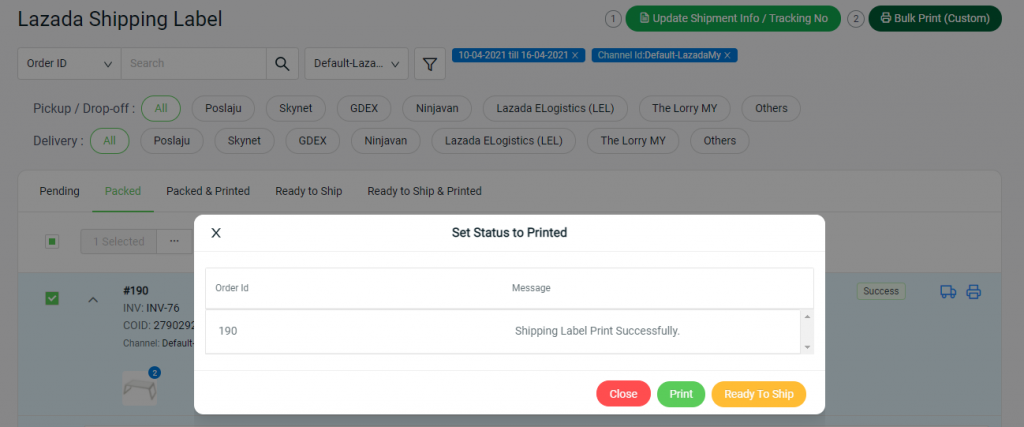
Step 2: Click on the Update Shipping Info / Tracking No button at the right top, to retrieve the latest order shipping information and tracking number.

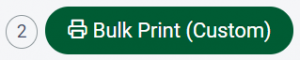
Step 3: Then, click on the Bulk Print (Custom) button to print out the Lazada Shipping Label. The Packing List and Invoice will be printed along with Shipping Label if the setting is enabled.
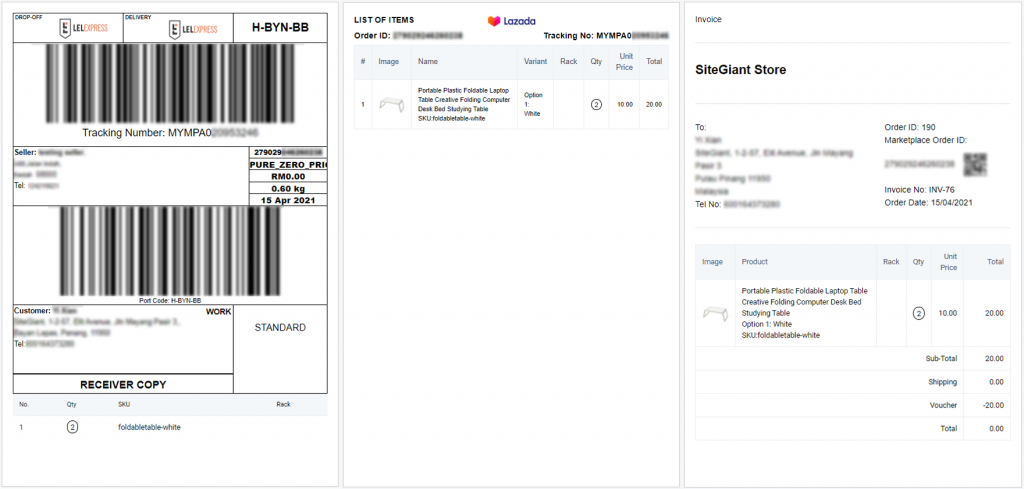
Step 4: Below is the sample of the SiteGiant Lite custom Lazada Shipping Label, Packing List and Invoice.
Step 5: Once the Shipping Label is printed, a message will be prompted. You may just choose to ‘Close‘ the message and set the order to Ready to Ship status later.
Step 6: If the message is closed without setting to Ready to Ship, the order will be updated to the Packed & Printed tab after you refresh the page.
For Latest Guide: Click here
Credits: SiteGiant Lite


