To map a network drive in Windows, open File Explorer, click “This PC” then click the “Computer” tab or “three-dots” menu to select “Map network drive“. Choose a drive letter, enter the network path (e.g., \Server\Share), and click “Finish”. You may be prompted to enter credentials to access the shared folder.
Step-by-Step Guide :
- Open File Explorer: Press the Windows key + E on your keyboard.
2. Go to “This PC“: In the left pane of File Explorer, click “This PC“.
3. Select “Map network drive“
Windows 10/11:
- Click the three-dot menu (More options) in the command bar and select “Map network drive“.
Older Versions:
- Click the “Computer” tab at the top of the window and select “Map network drive“.
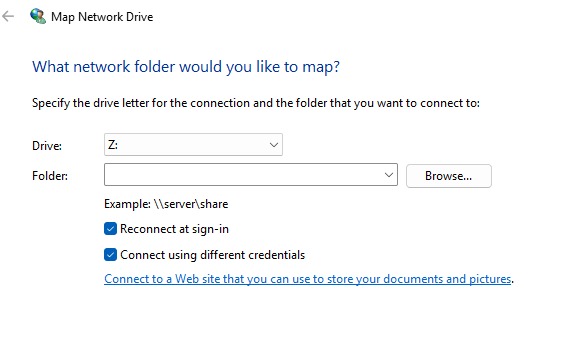
- Configure the drive: In the “Map Network Drive” window:
- Drive: Select an available drive letter from the dropdown list.
- Folder: Enter the network path to the shared folder (e.g. \\ServerName\ShareName). You can also click “Browse” to find the folder.
Optional Settings:
- Check “Reconnect at sign-in” to automatically connect to the drive every time you log in.
- Check “Connect using different credentials” if you need to use a different username and password to access the folder.
- Finish: Click the “Finish” button.
Enter Credentials: If prompted, enter your username and password to connect to the shared folder. - The mapped network drive will now appear under “This PC” for easy access.
Credit By : Webstation


