Windows File Sharing Basics #
Sharing Resources on a Home Network #
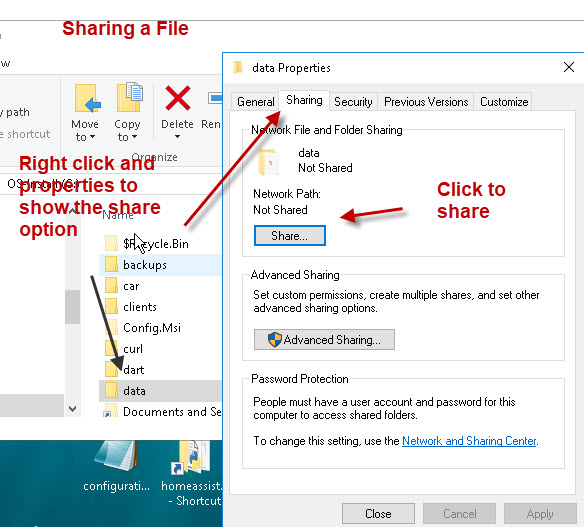
Step 1: To share a folder locate the folder in Windows File Explorer.
Step 2: Right click on the folder and click on properties you should see a screen similar to that below.
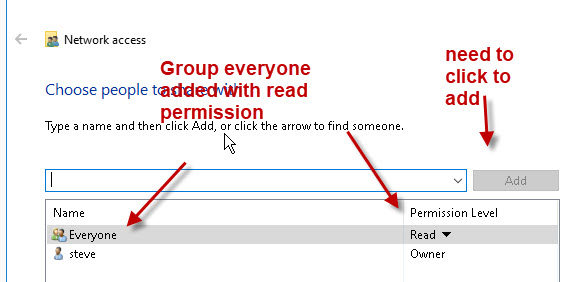
Step 3: You should then see a screen similar to that below were you need to choose a user to share the resource with, and the level of access that user has.

Step 4: You need to select the account and then click add and then adjust the permissions using the drop down arrow.
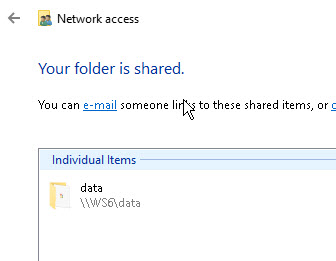
Step 5: When finished click on the share button to complete the operation you should see a confirmation screen similar to below:
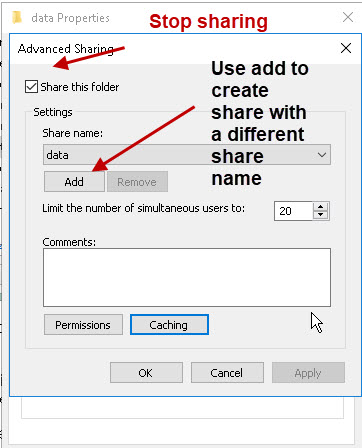
Advanced Sharing Options #
Advanced sharing option gives more control over the file share and even lets you limit the number of users connected to the shared folder.
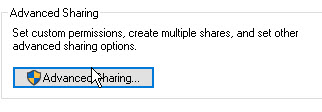
Step 1: Click on the Advanced Sharing.
Step 2: You can use it to share the folder with different share names and to stop sharing by un-checking the share this folder box:
Locating and Accessing Computers and Shared Resources #
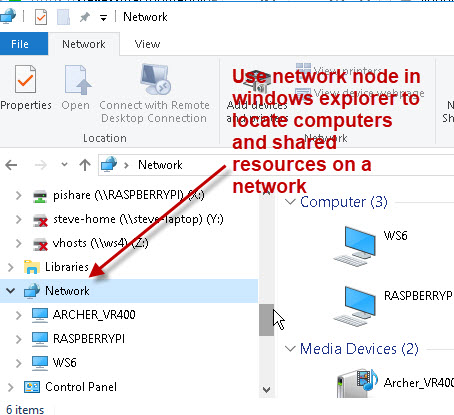
Using Network Browser #
All versions of Windows since windows for Workgroups have included a network browser.
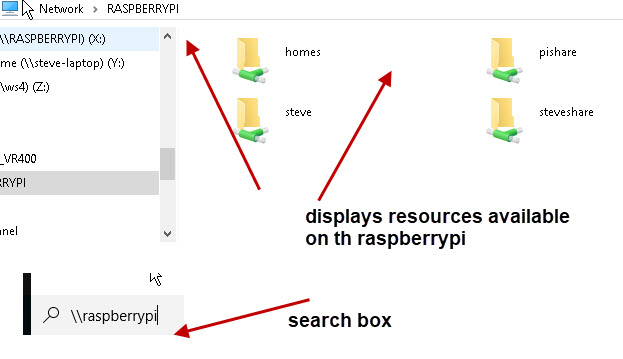
Using the Search Box #
Another and quicker way of locating resources if you know the name of the machine is to use the search box.
To display the resources available on a machine called raspberrypi type

Credits: stevessmarthomeguide


