Setting Up Your IP Allow List #
Below are instructions on how to set up your IP allow list for Exchange 2013, 2016, and Microsoft 365. If you are using Exchange 2013, you can set up an IP allow list using a command line. See instructions on this Technet article: Add-IPAllowListEntry
Step 1: Log into your mail server admin portal and click Admin.

Step 2: Click Exchange under Admin Centers in the left-hand menu.

Step 3: Click connection filter beneath protection.

Step 4: Click the Pencil icon to edit the default connection filter policy.

Step 5: Click connection filtering. Then, under the IP Allow list, click the + sign to add an IP address.

Step 6: On the Add allowed IP address screen, add IP addresses that you want to allow.

Step 7: Click OK, then Save. Next, you will want to set up a mail flow rule to allow our mail to bypass spam filtering and the Clutter folder.
Bypassing Clutter and Spam Filtering #
To ensure our messages will bypass your Clutter folder as well as spam filtering within Microsoft’s EOP, follow the steps below.
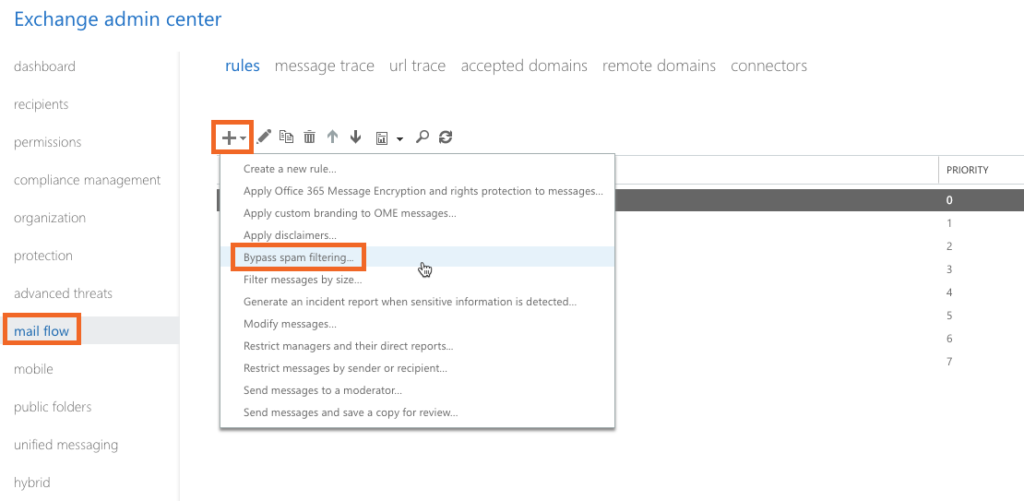
Step 1: From the Exchange admin center, select Mail Flow from the left-hand menu.
Step 2: Click the (+) button beneath Rules and then select Bypass Spam Filtering.
Exchange Admin Center:

Step 3: Give the rule a name, such as “Bypass Clutter & Spam Filtering by IP Address”.
Step 4: Click the Apply this rule if… drop-down menu and select The Sender then IP address is in any of these ranges or exactly matches.
New Rule Screen:

Step 5: Enter all of IP addresses that you want to whitelist, then click OK.
Specify Sender IP addresses:

Step 6: Click the Do the following drop-down and select Modify the message properties then set a message header.
Modifying the message properties:

Step 7: Click the *Enter text… button after “Set the message header” to set the message header. Enter the following: “X-MS-Exchange-Organization-BypassClutter“. This field is case sensitive. Once entered, click OK.
Step 8: Click the *Enter text… button after “to the value” and enter “true“. This field is case sensitive. Once entered, click OK and then add action.

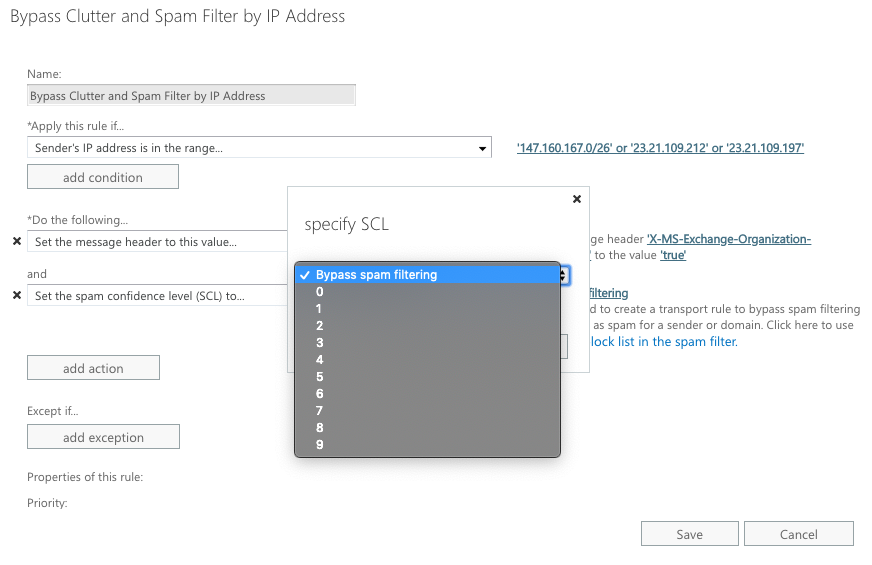
Step 9: From the drop-down menu for Do the following… select Modify the message properties. Then, click Set the spam confidence level (SCL) to… and select Bypass Spam Filtering.
Bypass Spam Filtering
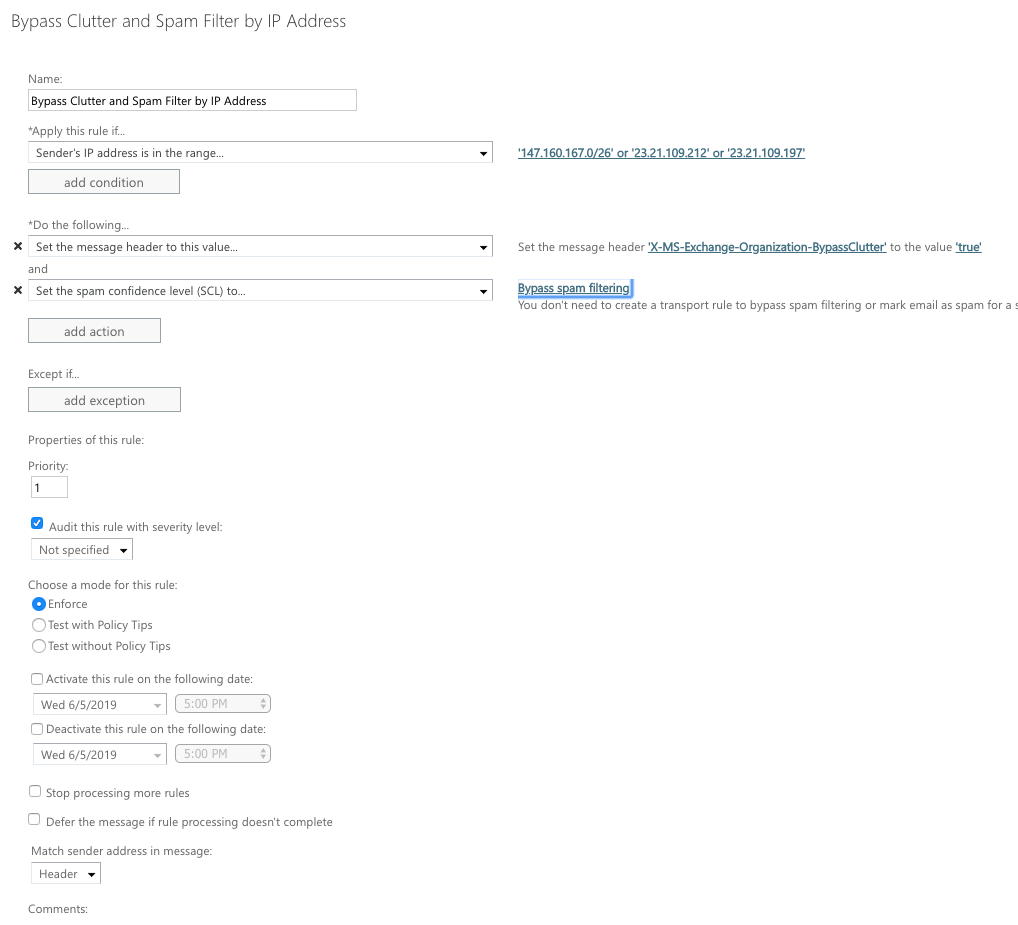
Step 10: Click Save. An example of the completed rule is shown below.
Completed Mail Flow Rule
If you are using Microsoft 365, you will now need to set up a mail flow rule to bypass your junk folder.
If you are using Exchange, your whitelisting is complete. To test out your whitelisting and make sure phishing security tests will reach your end users, you can set up a phishing campaign for a small test group that includes yourself. Once the simulated phishing email reaches your inbox, you’ll know you’ve successfully whitelisted our servers in your system.
Bypassing the Junk Folder (Microsoft 365 ONLY) #
This rule will allow only simulated phishing emails from us to bypass the Junk folder to ensure that your users are receiving simulated phishing emails in their inboxes.
Step 1: From the Exchange admin center, select mail flow from the left-hand menu.
Step 2: Click the (+) button beneath Rules.
Step 3: Select Bypass spam filtering….
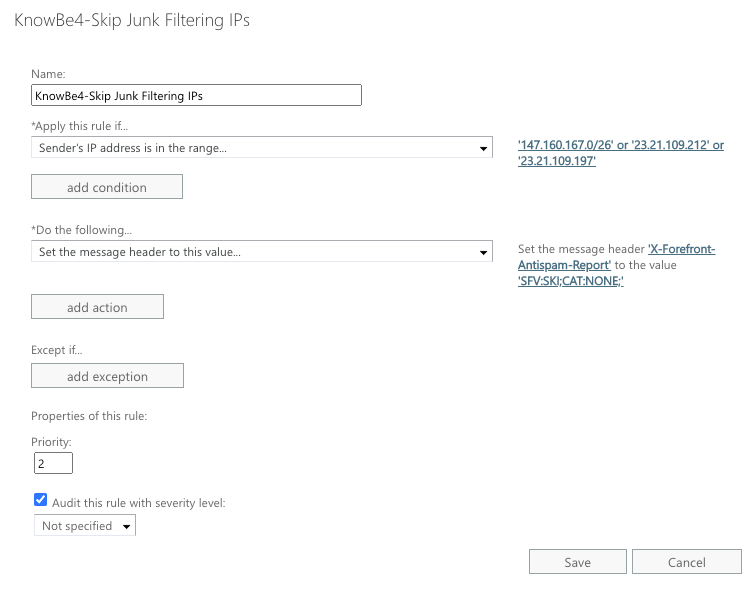
Step 4: Give the rule a name, such as “KnowBe4-Skip Junk Filtering”.
Step 5: Click the Apply this rule if… drop-down menu and select The Sender, then select IP address is in any of these ranges or exactly matches.
Step 6: Enter all IP addresses that you want to whitelist, then click OK.
Step 7: Click the Do the following drop-down menu and click Modify the message properties then Set a Message Header.
Step 8: Click on the *Enter text… button after “Set the message header” to set the message header. Enter the following text: “X-Forefront-Antispam-Report“. This value is case sensitive. Then, click OK.
Step 9: Click the *Enter text… button after “to the value” and enter “SFV:SKI;CAT:NONE;“. To learn more about this header, click here. Please be aware that this field is case sensitive. Once the text is entered, click OK.
Step 10: Click Save.
Step 11: Beneath Properties of this rule, set the priority to directly follow the rule you created in the Bypassing Clutter and Spam Filtering section.
Completed Mail Flow Rule
Next, you will need to set up a connector in order to prevent deferment.
Setting Up a Connector to Prevent Deferments (M365 ONLY) #
Adding a connector will prevent your emails from being deferred in Microsoft 365 due to Microsoft’s rate limiting or similar settings.
Step 1: From your Exchange admin center, navigate to mail flow > connectors.
Step 2: Click the + sign to create a new connector.
Step 3: In the Connection from field, select Partner organization.
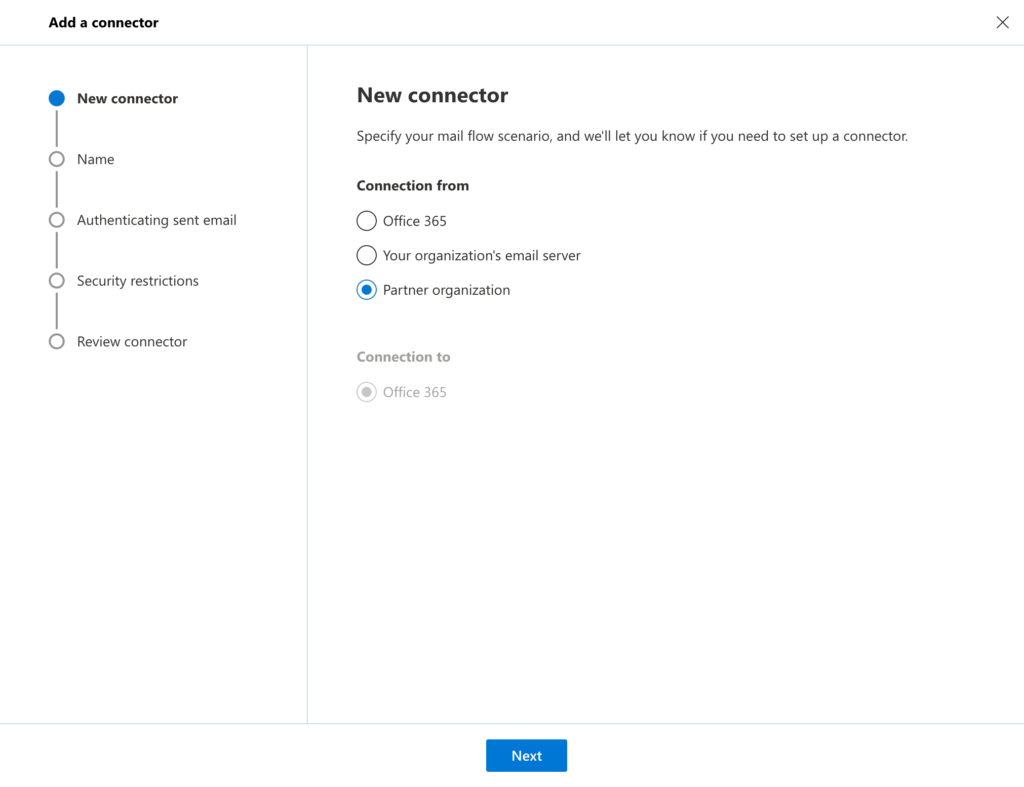
Step 4: In the Connection to field, Office 365 should be automatically selected. If it is not, select Office 365.
Step 5: Click Next.
Step 6: On the next screen, you will need to name the connector. You can also add a description if you’d like.
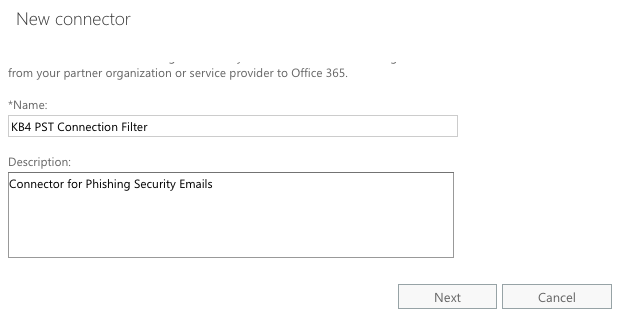
Step 7: When you’re done, click Next.
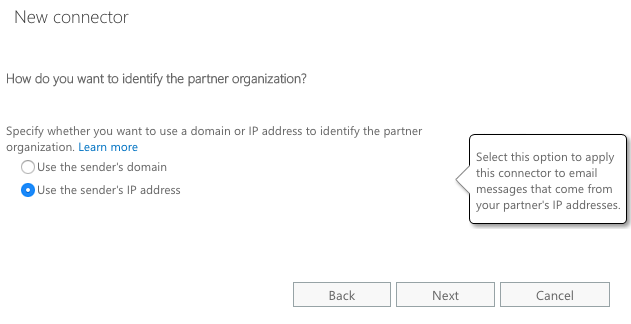
Step 8: Select the Use the sender’s IP address option and then, click Next.
Step 9: Add all sender IP addresses here.
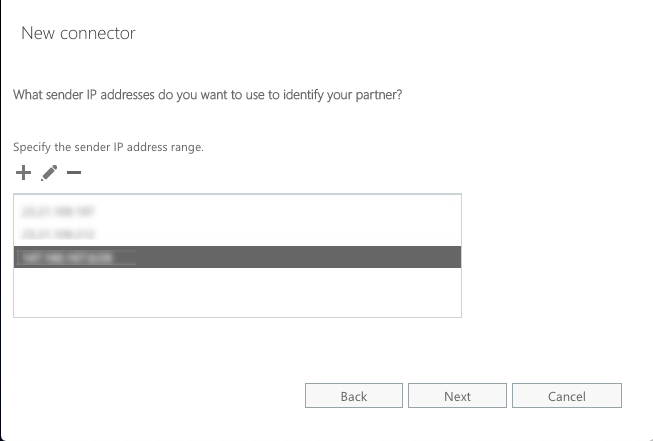
Step 10: Once you’ve added all the IP addresses, click Next.
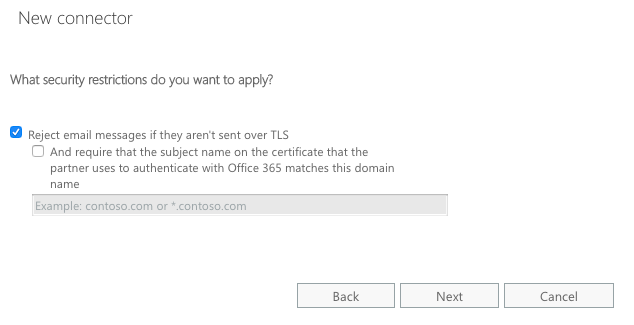
Step 11: Select the Reject email messages if they aren’t sent over TLS security option. This option ensures that only emails that are TLS encrypted will be sent through. We send all our emails over TLS for security purposes.
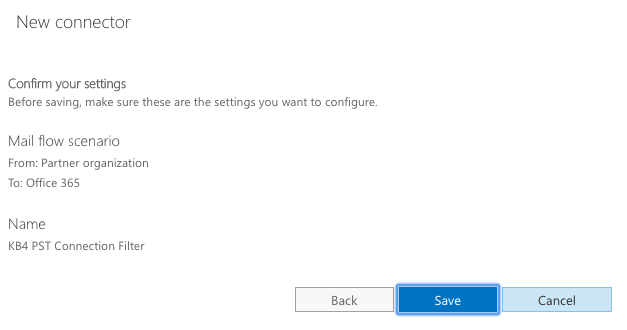
Step 12: Click Next and then after reviewing that your settings for the connector are correct, click Save.
Credits: https://support.knowbe4.com/
Related Posts: How to Change Junk Email Options in Outlook – Office 365


