Below will be a sample of video tutorial on “How to Setup an IMAP Account in Microsoft Outlook 2016 using NON SSL setup. “
For SSL setup you may just replace the “Serverhostname” and “SSL ports”
Step by Step Guidance #
1. Launch your Microsoft Outlook 2016.
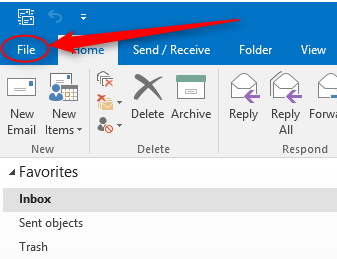
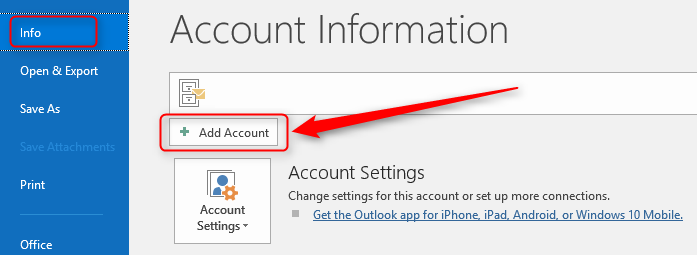
2. From Top left menu, click on FILE > make sure that Info is selected on the left > click on Add Account.
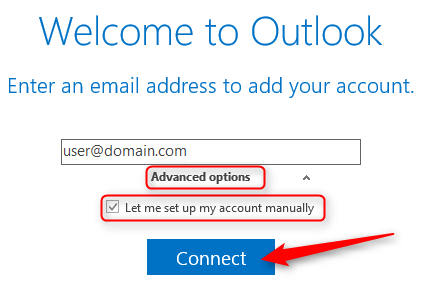
3. Enter your full email address > Click on “Advanced options” > tick “Let me set up my account manually“. Then click Connect.
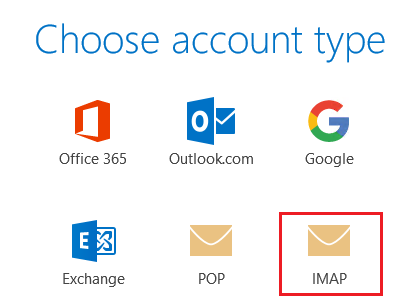
4. Choose account type, select IMAP.
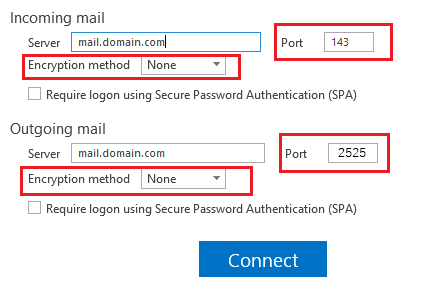
5. Now enter your Incoming and Outgoing servers setting in their respective text boxes.
Use the respective values depending whether you want to use SSL or NON-SSL.
NON-SSL
Incoming mail server IMAP : mail.domain.com
Outgoing mail server SMTP : mail.domain.com
(replace your OWN domain name for domain)
SSL
Incoming mail server IMAP : serverhostname
Outgoing mail server SMTP : serverhostname
(serverhostname refers to the name of the server that is hosting your email.
serverhostname can be found from your web hosting control panel server information section )
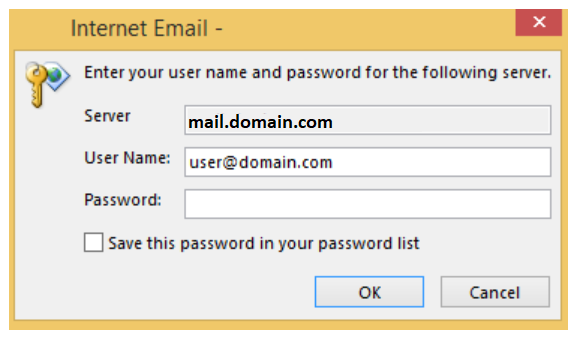
6. Enter password for your email address then Click OK.
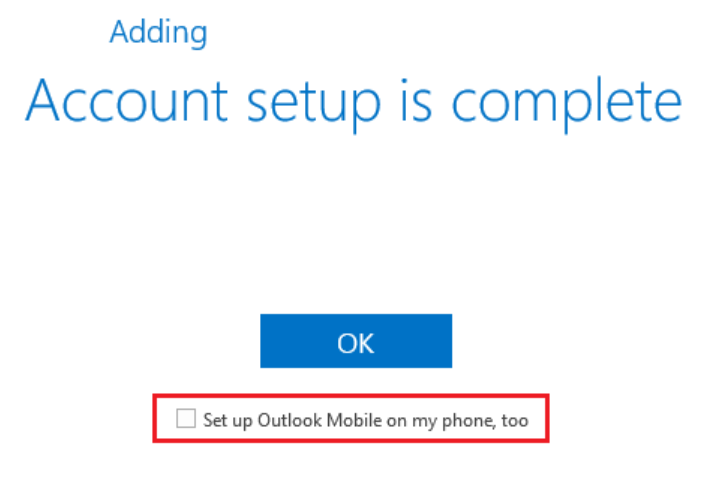
7. Account setup is complete. Check the checkbox if you want to setup outlook mobile on phone then click OK.
Your email account now is ready to use.
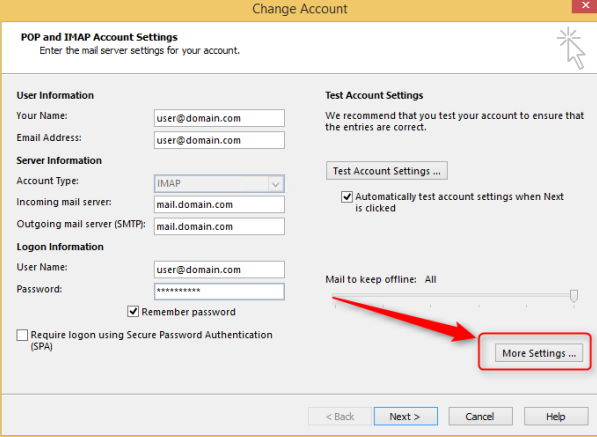
Note: If you wish to edit the Account Setting , you may proceed with below step
1. File > Account Setting > Double click your email address > More Settings
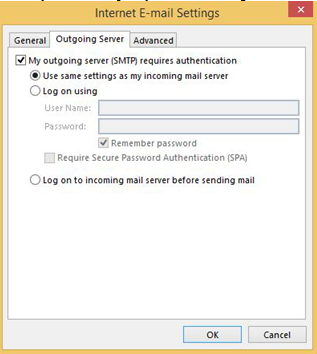
2. Click on Outgoing server tab to check on My outgoing server (SMTP) requires authentication.
This is currently our mail server policy to allow sending from mail client.
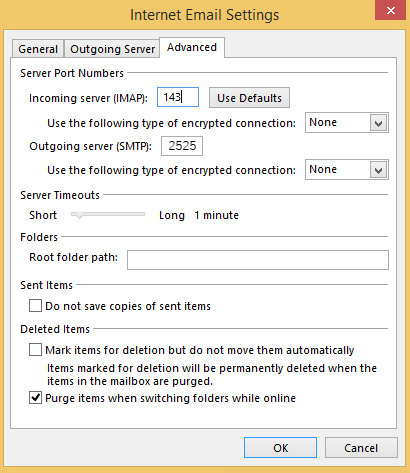
3. Click on the Advanced tab and you can edit your port setting here. Use the values below.
SMTP Port: 2525
SMTP SSL Port: 465
IMAP Port: 143
IMAP SSL Port: 993
NOTE: If you choose SSL settings, check This server requires an encrypted connection (SSL) box.
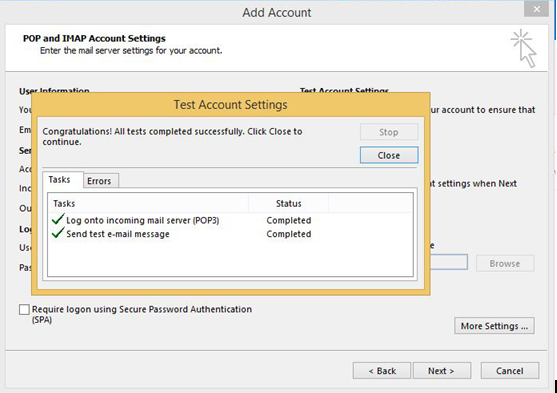
4. After the edit, click OK. Then click on Next and click on Close after the Test Account Settings has been done.
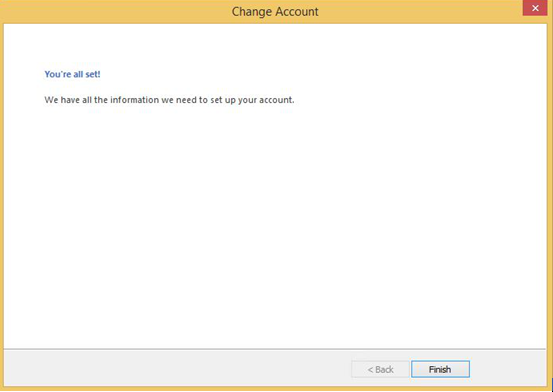
5. Your email account in Microsoft Outlook 2016 is ready to use.
Adjusting the Send/Receive Frequency #
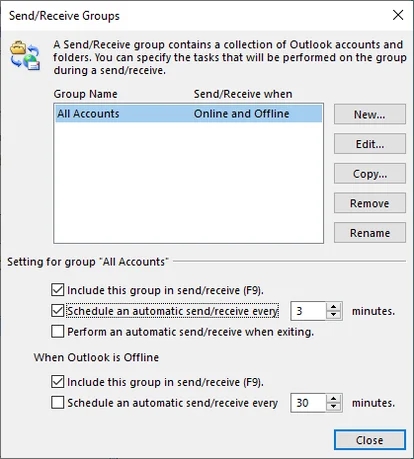
Adjusting Outlook’s Send/Receive schedule can often improve performance. If email messages are slow showing up in your Inbox, you can configure Outlook to send/receive messages more frequently so that it doesn’t have to download as much data each time it checks for new messages. If your send/receive schedule is set to check less-frequently, say, every 30 minutes, try changing it to send/receive every 3 minutes.
Microsoft Outlook users can find this setting via File | Options | Advanced. Locate the Send/Receive section and click on the Send/Receive button. Then, under Send/Receive Groups | All Accounts, adjust the timing for “Schedule an automatic send/receive every…” as shown here:
Compacting a PST in Outlook #
PST files can be another source of Outlook sluggishness. You can help improve Outlook’s performance by:
- Using multiple PST files.
- Keeping attachments out of PST files.
- Compacting PST files.
To compact a PST file in Outlook 2010, 2013 and 2016:
- Delete any items you no longer need, and then empty the Deleted Items folder.
- Click on the File tab on the ribbon, and then select the Info tab.
- Click on Account Settings, and then click on Account Settings again.
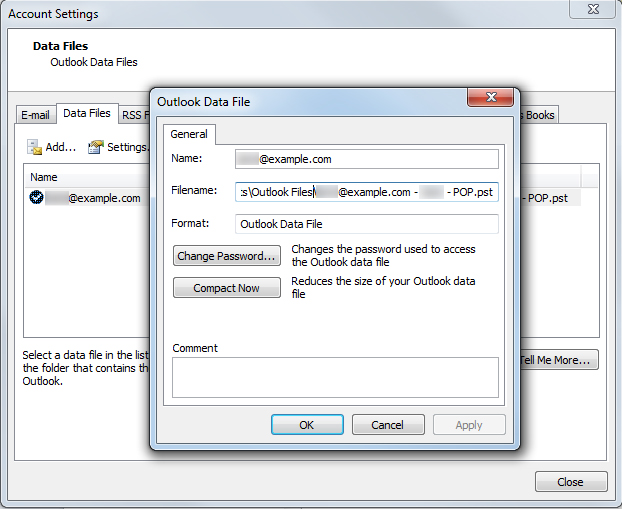
- Click on the Data Files tab.
- Select your PST file in the list, and then click on Settings.
- On the General tab, click on Compact Now.
- Click on OK and Close.
Sometimes, your PST files can develop errors or data inconsistencies, resulting in unexpected behavior in Outlook. When you suspect that there’s an issue with the integrity of your PST file, you can run Scanpst.exe to repair your PST files.
Scanpst can be tricky to locate. By default, you should be able to find it in the Program Files | Microsoft Office | Office16 folder, but you may need to perform a search if you can’t find it in its default location. This location may vary depending on which version of Outlook you are using. You may also want to create a shortcut to this file on your desktop for easier access.
Before using this tool, we recommend making a backup copy of your PST file in case any errors or file corruptions occur to the original file. This shouldn’t be an issue, however, because if Scan PST finds any errors, it will prompt you to make a backup before attempting to repair the file.
Credits : Webstation


