How to Add eGHL Payment Gateway in SiteGiant Lite #
Register eGHL Merchant Account #
Kindly send an email to us and we will connect you to the eGHL representative in order to proceed with your eGHL merchant account application for SiteGiant Lite.
Set Up eGHL Integration #
Step 1: Go to the Settings.

Step 2: Select the Payments.

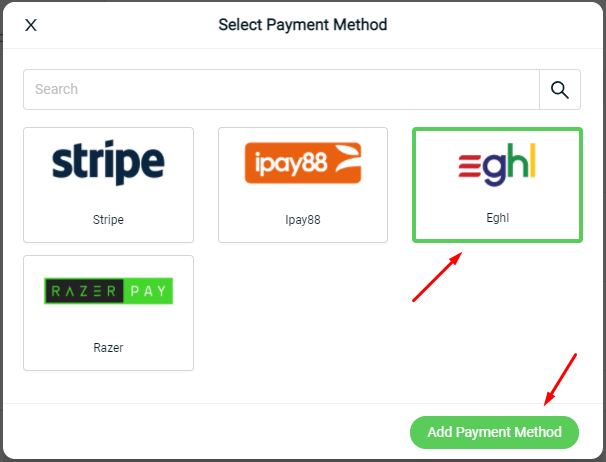
Step 3: Click on the ‘Add Payment Method‘ button.
![]()
Step 4: Choose ‘Eghl‘ payment method, and click on ‘Add Payment Method‘.
Step 5: Fill in the field below.
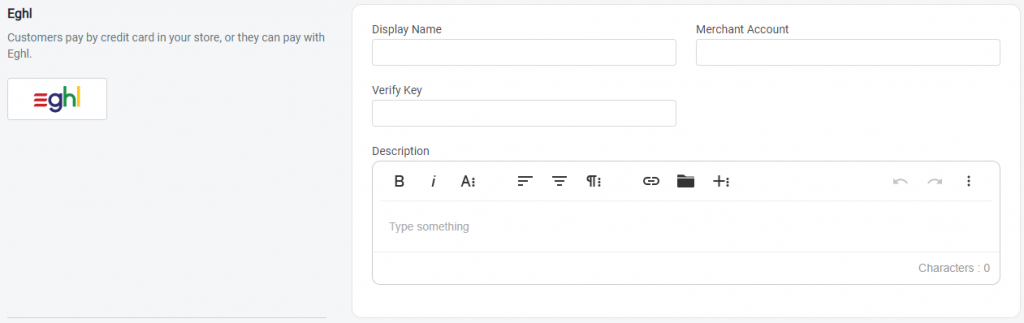
Display Name: The payment name to display in the Payment Method Step during the checkout process.
Merchant Account*: Merchant ID that given by eGHL.
Verify Key*: Merchant Password that given by eGHL.
Description: Extra information to be shown to the customer during checkout.
Step 6: You may set extra transaction charges applied to the customer at the Payment Settings. (optional)

Step 7: Click on the ‘Add’ button.
![]()
Test Checkout via eGHL #
Now you have activated eGHL on your SiteGiant store. Please try to make a purchase via eGHL on your webstore to check if you have successfully redirected to the eGHL page to proceed with payment. If you manage to reach to eGHL page to make payment, you have successfully integrated eGHL and eGHL is live on your SiteGiant store now.
For Latest Guide: Click here
Credits: SiteGiant Lite
Related Posts: How to Add iPay88 Payment Gateway


