A power plan is a collection of hardware and system settings that manages how your computer uses power. Power plans can help you save energy, maximize system performance, or achieve a balance between the two.
Changes made to a power plan will affect all users that use the same power plan as their default active power scheme.
Windows 11 includes the following default power plans: #
- Balanced = Offers full performance when you need it and saves power when you don’t. This is the best power plan for most people. Allows you to change your Power Mode.
- Power saver = Saves power by reducing PC performance and screen brightness. If you’re using a laptop, this plan can help you get the most from a single battery charge.
- High performance = Maximizes screen brightness and might increase PC performance. This plan uses a lot more energy, so your laptop battery won’t last as long between charges.
- Ultimate Performance = Only available in the Windows 11 Pro for Workstations edition by default. Provides ultimate performance on higher end PCs. It builds on the current High-Performance policy, and goes a step further to eliminate micro-latencies associated with fine grained power management techniques. As the power scheme is geared towards reducing micro-latencies it may directly impact hardware; and consume more power than the default balanced plan. The Ultimate Performance power policy is currently not available on battery powered systems.
- Custom = These are custom power plans created by a user on the PC and/or included by your PC manufacturer (OEM).
This tutorial will show you how to choose a power plan to be the current active power scheme used by default for your account in Windows 11.

OPTION ONE
Change Power Plan in Control Panel #
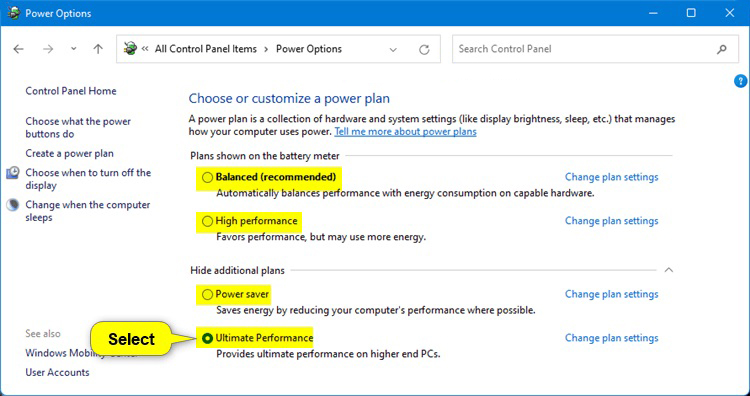
- Open the Control Panel (icons view), and click/tap on the Power Options icon.
- Select (dot) the power plan (ex: “Ultimate Performance”) you want to use by default for your account. (see screenshot below)
- You can now close the Control Panel if you like.
OPTION TWO
Change Power Plan using Command #
- Open Windows Terminal (Admin), and select either Windows PowerShell or Command Prompt.
- Copy and paste
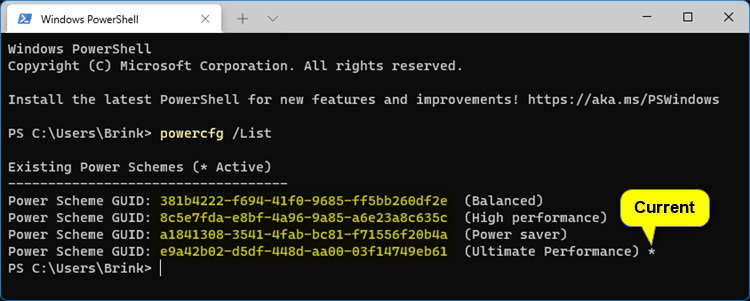
powercfg /listinto the terminal, and press Enter. This will give you a list of all available power plans on the PC along with their GUID. Make note of the GUID of the power plan you want to choose. (see screenshot below)
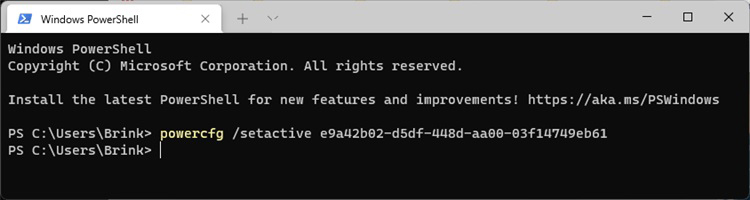
- Type or copy and paste the command below you want to use into the terminal, and press Enter. (see screenshot below)
(Good for custom power plan)powercfg /setactive GUID
(Balanced)powercfg /setactive 381b4222-f694-41f0-9685-ff5bb260df2e
(High performance)powercfg /setactive 8c5e7fda-e8bf-4a96-9a85-a6e23a8c635c
(Power saver)powercfg /setactive a1841308-3541-4fab-bc81-f71556f20b4a
(Ultimate Performance)powercfg /setactive e9a42b02-d5df-448d-aa00-03f14749eb61
- You can now close Windows Terminal if you like.
Credits: ElevenForum


