In AutoCount Accounting version 2.2.18.26 or earlier, the e-Invoice settings were located under:
- Company Profile > e-Invoice tab
- Tools > Options > Country & Tax > e-Invoice tab
Starting from version 2.2.18.26 onwards, all settings have been consolidated under e-Invoice menu > e-Invoice Setting.
Between versions 2.2.19.27 and 2.2.22.30, there were minor adjustments to the e-Invoice Setting details. This document is based on version 2.2.22.30 for accuracy.
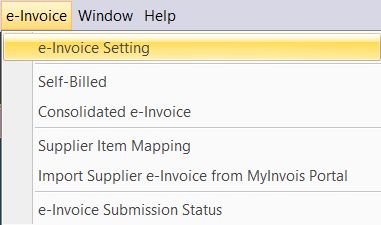
Setup and configure your e-Invoice in three Steps #
Step 1 – Configure e-Invoice Setting #
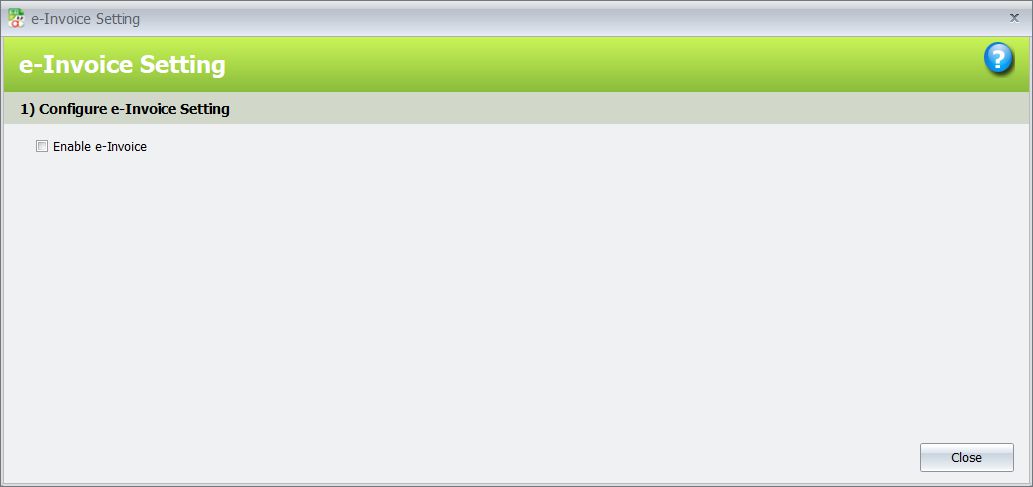
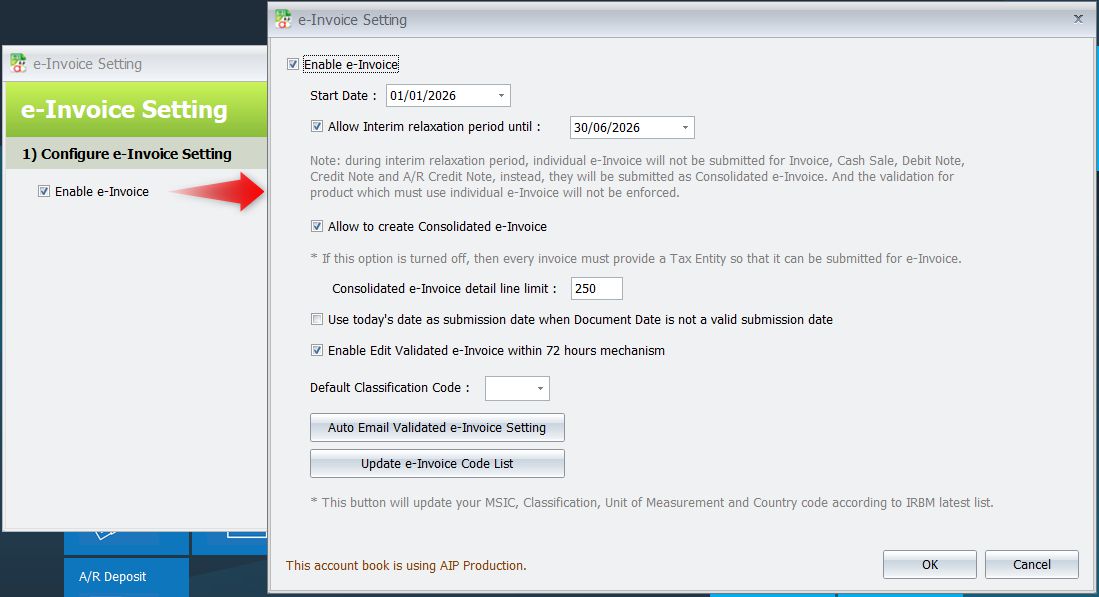
This section allows you to set the start date for e-Invoice and configure related settings. Please check the “Enable e-Invoice” checkbox to turn it on. Once enabled, the e-Invoice Settings screen will appear, and you can begin configuring the settings.
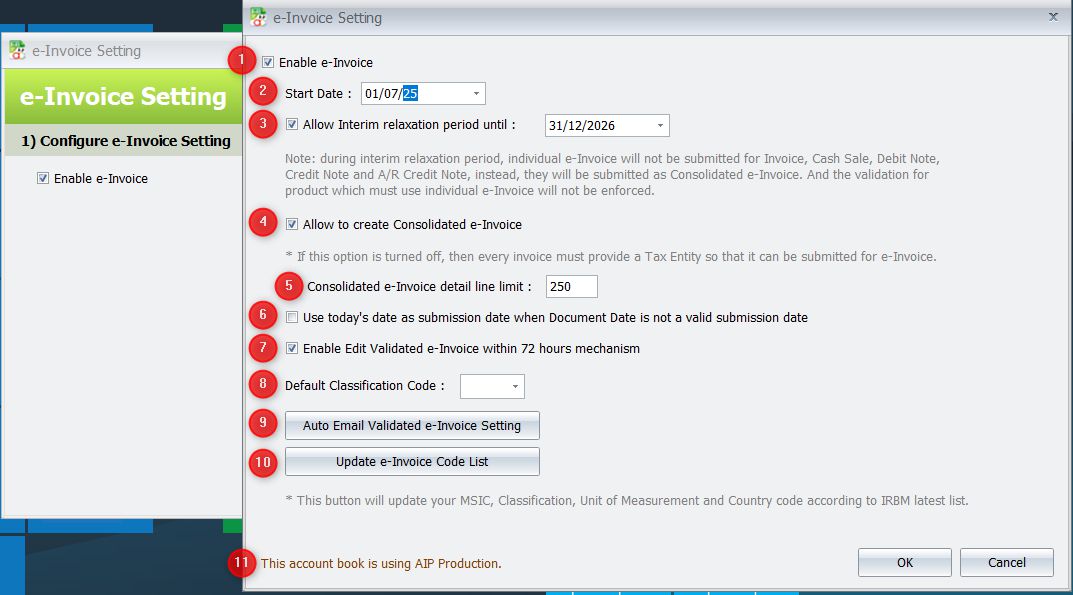
1) Enable e-Invoice
“Enable e-Invoice” will be automatically enabled based on the main setting. When “Enable e-Invoice” is unchecked, all other options will be disabled.
2) Start Date
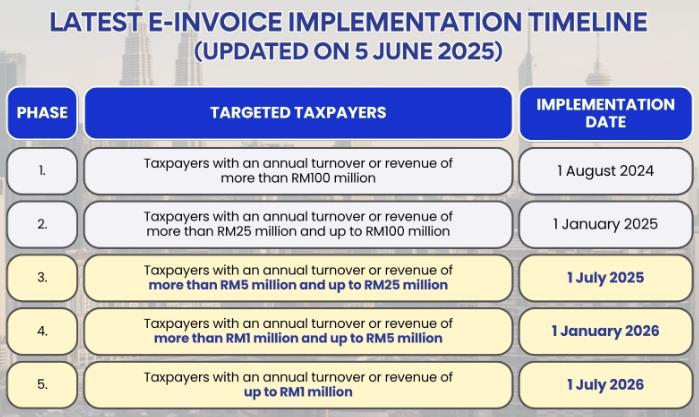
Enter the date you want to start submitting your e-Invoices to IRBM. Please refer to the screenshot below for the e-Invoice implementation timeline.
3) Allow interim relaxation period until
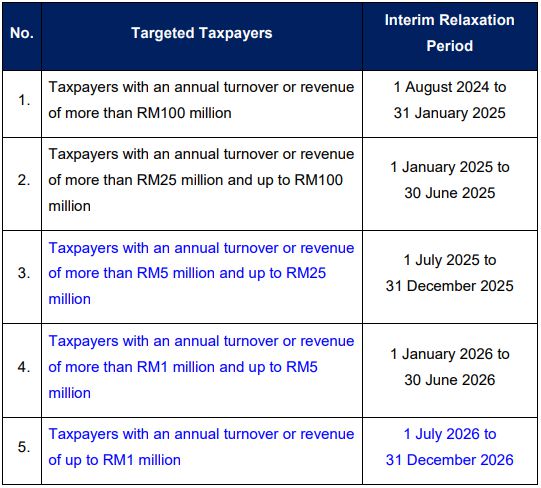
To ensure the smooth transitioning and implementation of e-Invoice, the Government of Malaysia has, on 26 July 2024, agreed to provide taxpayers a six (6)-month interim relaxation period from the date of mandatory implementation of each implementation phase.
During the interim relaxation period, Government of Malaysia has agreed to allow taxpayers to adopt the following:
(a) issue consolidated e-Invoice for all activities and transactions, including the industries or activities listed under Section 3.7 of this e-Invoice Specific Guideline.
(b) issue consolidated self-billed e-Invoice for all self-billed circumstances outlined under Section 8.3 of this e-Invoice Specific Guideline.
(c) input any information / details in the “Description of Product or Service” field in the consolidated e-Invoice or consolidated self-billed e-Invoice. In other words, taxpayers are not restricted to input the receipt / statement / bill reference numbers as required under Section 3 and 4 of this e-Invoice Specific Guideline.
(d) not to issue individual e-Invoice or individual self-billed e-Invoice, even if the buyer (in the case of e-Invoice) / supplier (in the case of self-billed e-Invoice) has made a request for an individual e-Invoice or individual self-billed e-Invoice to be issued, provided that the taxpayers comply with item (a) or (b) above, as the case may be.
Additionally, the IRBM will not undertake any prosecution action under Section 120 of the Income Tax Act 1967 during the interim relaxation period on non-compliance of the e-Invoice requirements, provided that taxpayers comply with the requirements mentioned under Section (a) and (b) of this e-Invoice Specific Guideline.
Select this option and set the appropriate date for the interim relaxation period. Please refer to the screenshot below for the details on the Interim Relaxation Period.
4) Allow to create Consolidated e-Invoice
Check the box of “Allow to create Consolidated e-Invoice” if your industry regulations
permit it.
If this option is turned off, then every invoice must provide a Tax Entity so that it can be
submitted for e-Invoice.
5) Consolidated e-Invoice detail line limit
This setting helps manage the 300KB file size limit when submitting consolidated e-Invoices. If you encounter errors during submission, try reducing the line limit. By default, this setting is set to 250 lines.
6) Use today’s date as submission date when Document Date is not a valid submission date
Check the box of “Use today’s date as submission date when Document Date is not a valid submission date” if you want the system to automatically use the today date as the e Invoice issue date whenever the original Document Date is not valid for submission (Document Date earlier than 3 days or future date).
Example:
If this option is checked, and you create an e-Invoice with Document Date = 01/07/2025
while today is 24/07/2025, the system will automatically use 24/07/2025 as the e-Invoice
submission date when you save the document.
7) Enable Edit Validated e-Invoice within 72 hours mechanism
When disabled, only non–e-Invoice-related fields can be edited. This setting is checked by default. If you do not wish to run this mechanism, kindly uncheck it.
If the setting is unchecked and you attempt to edit any e-Invoice related fields, a blocking message will prompt you during save.
8) Default Classification Code
Set a default classification code to be automatically applied to any item that does not have an assigned classification or has an empty item code.
9) Auto Email Validated E-Invoice Setting
Enable this setting to automatically email the invoice to your customers once the e-invoice has been successfully validated.
10) Update e-Invoice Cost List
This button will update your MSIC, Classification, Unit of Measurement and Country code according to IRBM latest list.
11) This Account Book Is Using AIP Production / Staging
This setting indicates whether the current account book is connected to AIP Production or AIP Staging.
- AIP Production is connected to the MyInvois live environment (https://mytax.hasil.gov.my/).
- AIP Staging is connected to the MyInvois prepod/sandbox environment (https://preprod-mytax.hasil.gov.my/).
To switch to AIP Staging mode, please contact your software dealer for assistance in creating a testing account book and linking it to AIP Staging.
Note: An account book with a registered license cannot be connected to AIP Staging.
Step 2 – e-Invoice Status #
This section connects the AIP server to your account and configures the license settings. Use this option to activate e-Invoice on AIP Server.
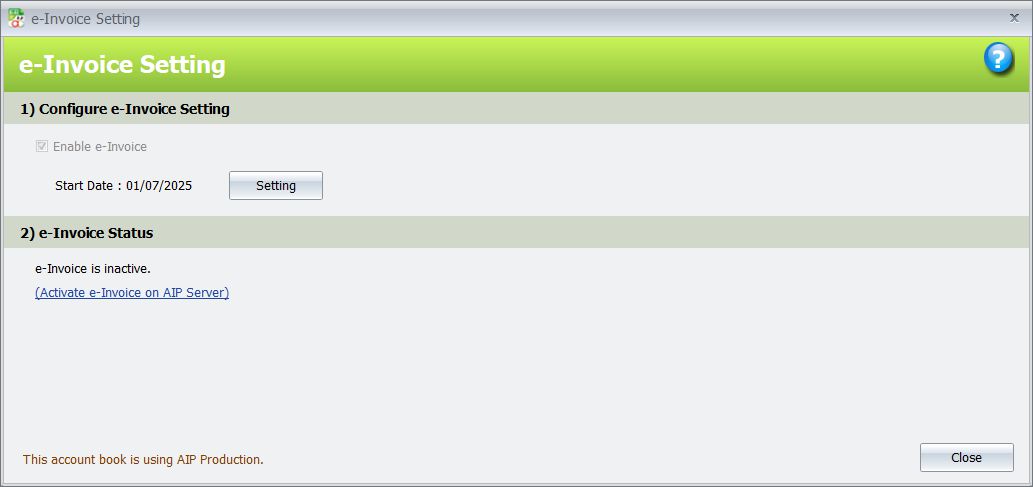
Click Activate e-Invoice on AIP Server to do the linking.
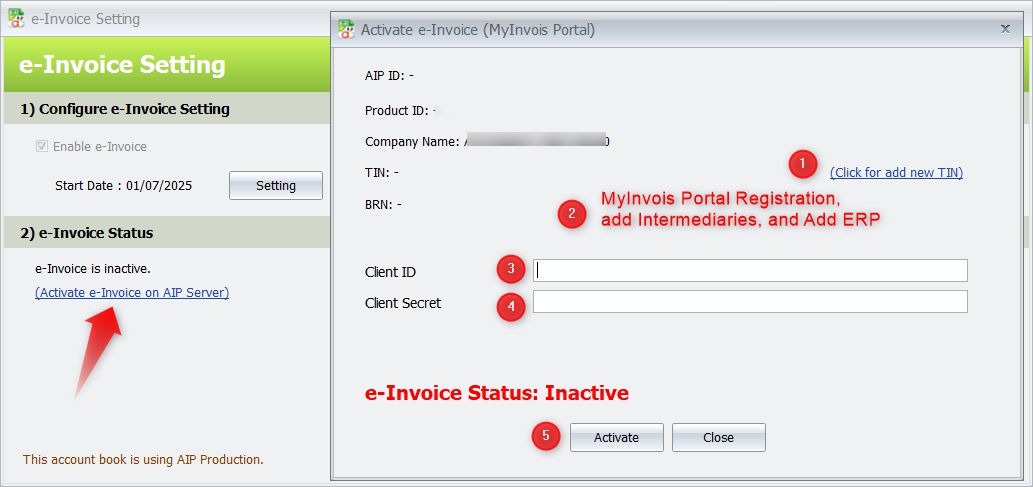
Steps to Link Your Company Tax Entity and Activate AIP Server Access:
- Add Your Company’s Tax Entity
If you haven’t yet linked your company’s tax entity in the Company Profile, click Click for add new TIN. - Complete Required Registration on MyInvois Portal
Follow the instructions in the MyInvois Portal General Guide Rev 9 to:
o Register and link your company
o Add intermediaries
o Add ERP – note down the Client ID and Client Secret - Enter your Client ID
- Enter your Client Secret
- Click Activate.
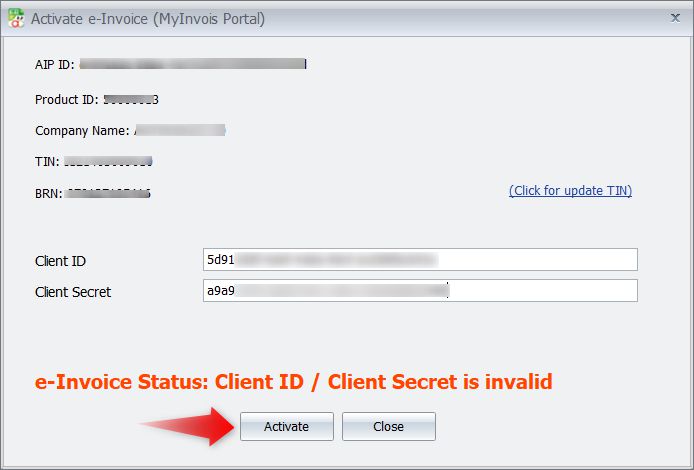
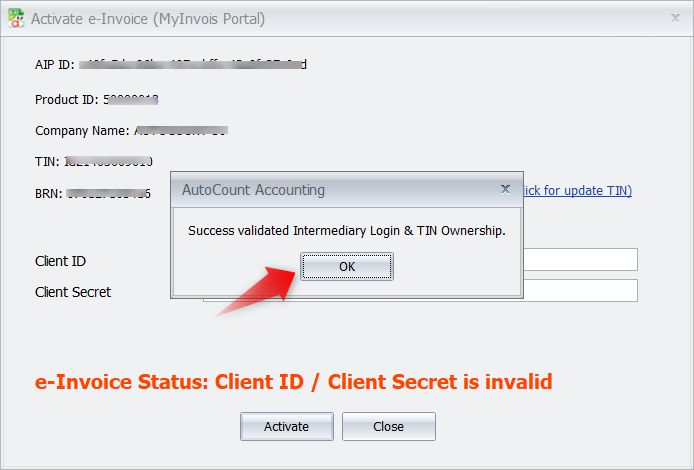
When validation is successful, the system will display a dialog with the message:
“Successfully validated Intermediary Login & TIN Ownership.”
Click OK to continue.
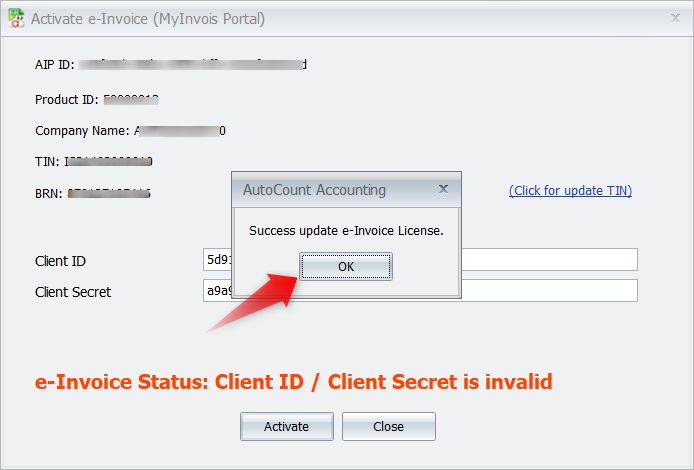
If your e-Invoice license has been activated on the License Portal, it will be automatically updated. Click OK.
If you encounter the error: “License Portal error: e-Invoice License information not found in License Portal. Please contact your servicing agent to assist you on this matter”, this means the e-Invoice license has not been properly registered on the License Portal. You should contact your software provider to for assistance in registering your company’s e-Invoice license. If your license is not yet ready, you can click Close and obtain it later.

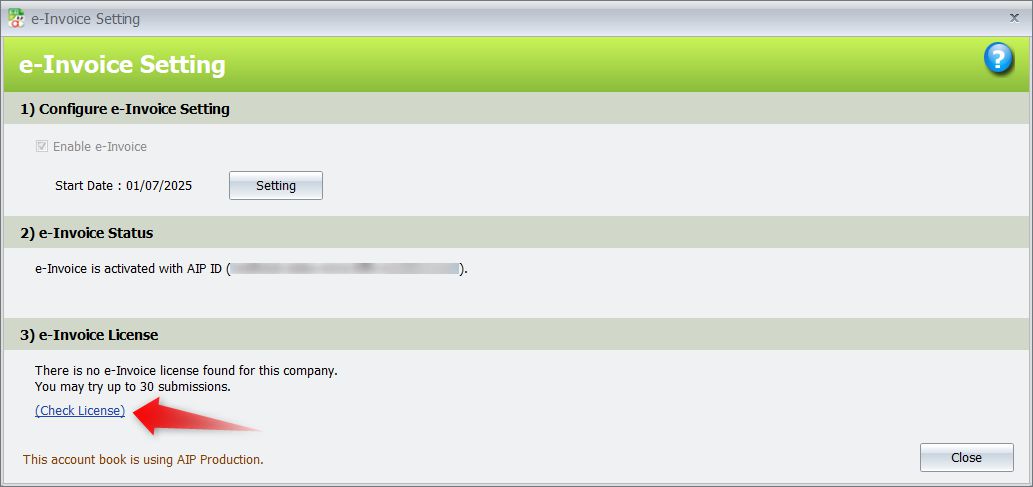
Step 3 – e-Invoice License #
This section allows you to activate the e-Invoice license.
Once Section 2 – e-Invoice status is activated, Section 3 – e-Invoice License becomes visible.
An unlicensed book can submit up to 30 e-Invoices only.
Click Check License to activate your e-Invoice License.
(Ensure that you have purchased the e-Invoice module and that the e-Invoice license has
been issued.)
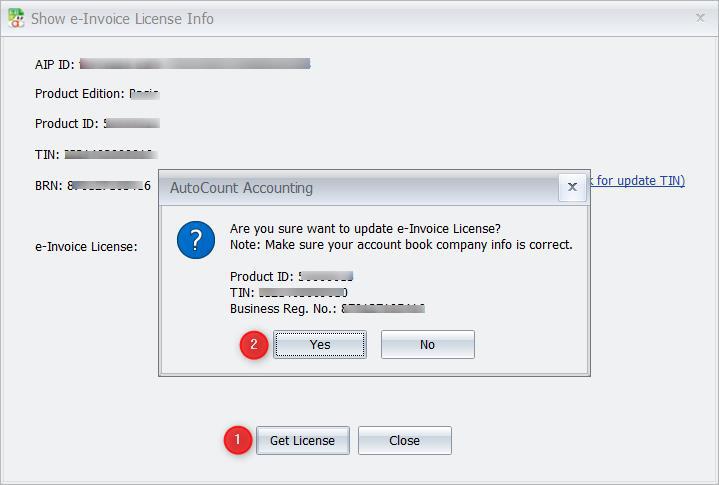
Click Get License, verify that all information is correct, and then click Yes to confirm.
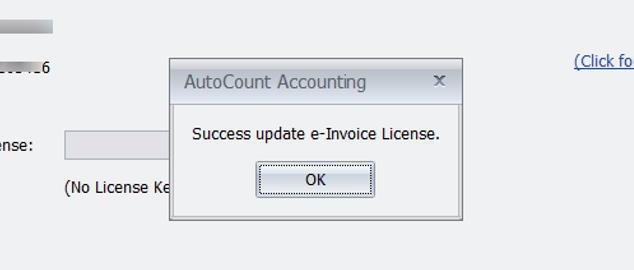
Success update e-Invoice License. Click OK.
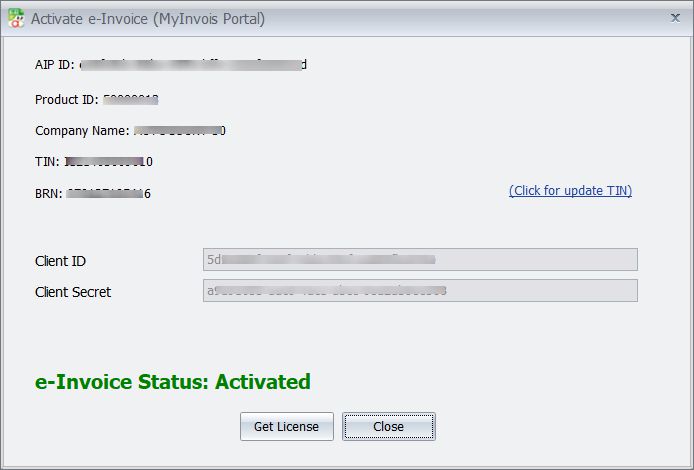
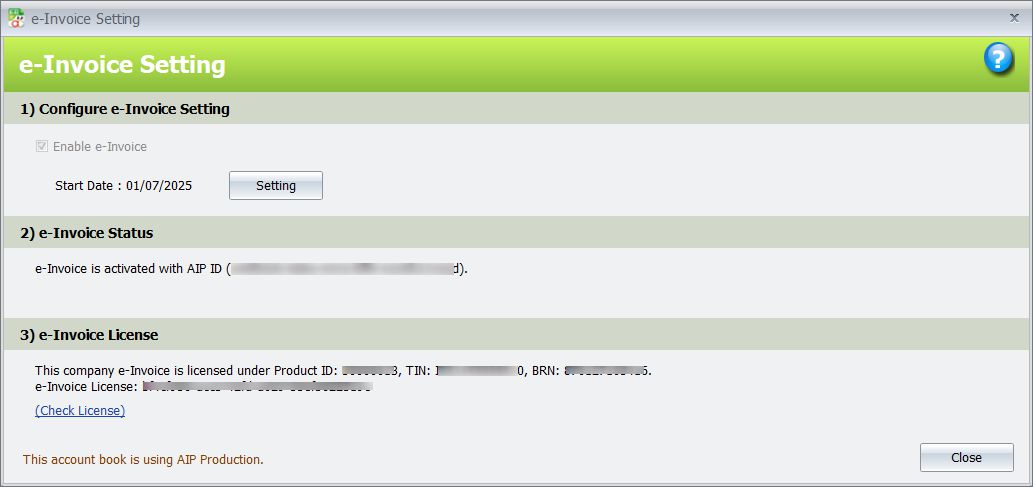
Once the e-Invoice license is successfully activated, the system will display that this company’s e-Invoice is licensed under the Product ID, TIN, BRN and e-Invoice License.
Published on 25/07/2025
Credit By : Webstation


