How to Add Login with Facebook #
Create Facebook App #
Step 1: First, you have to create a Facebook app from Facebook Developer.
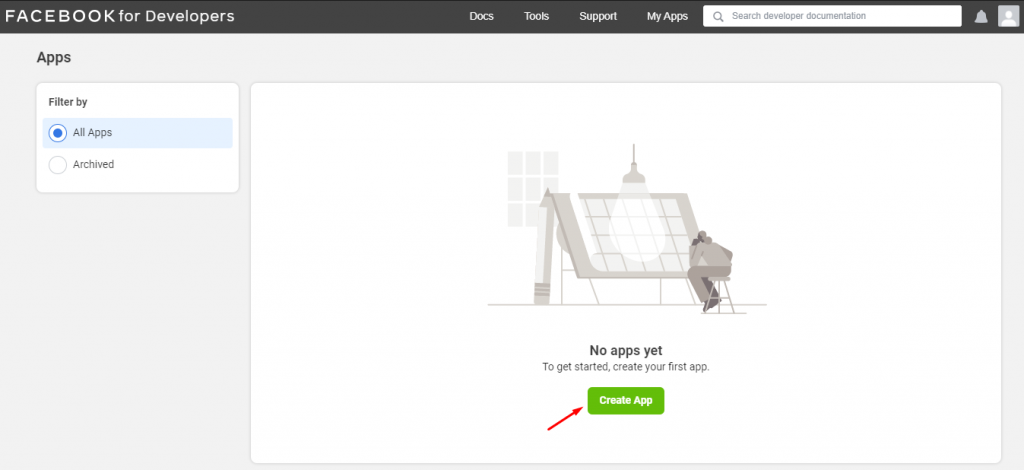
Step 2: From the Facebook Developer Apps, click Create App.
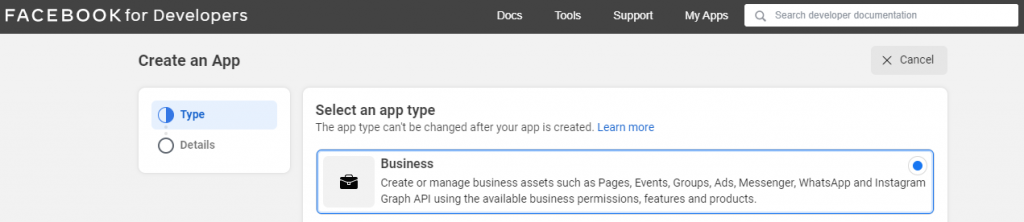
Step 3:Select App Type as Business. Then, click on ‘Next’.
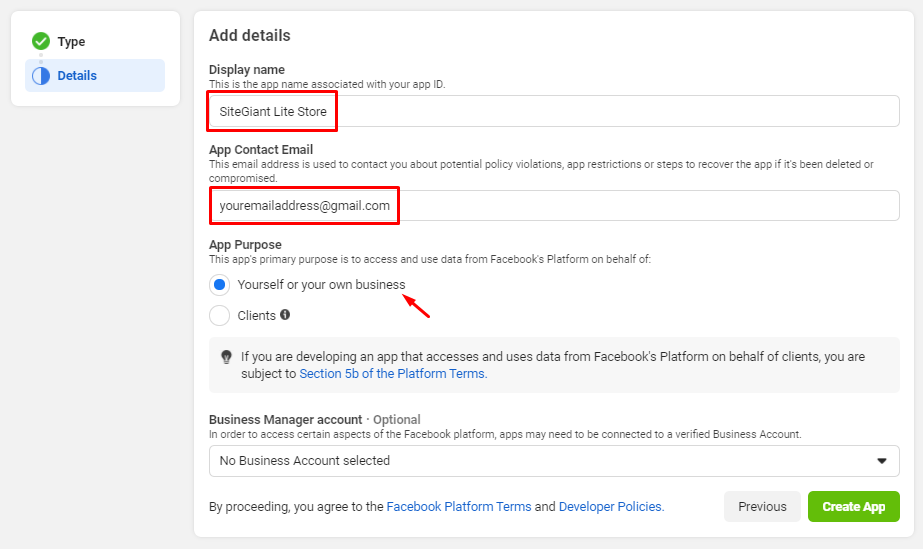
Step 4: Fill up the Display Name, Email and choose the App Purpose. After that, click on ‘Create App’ to proceed.
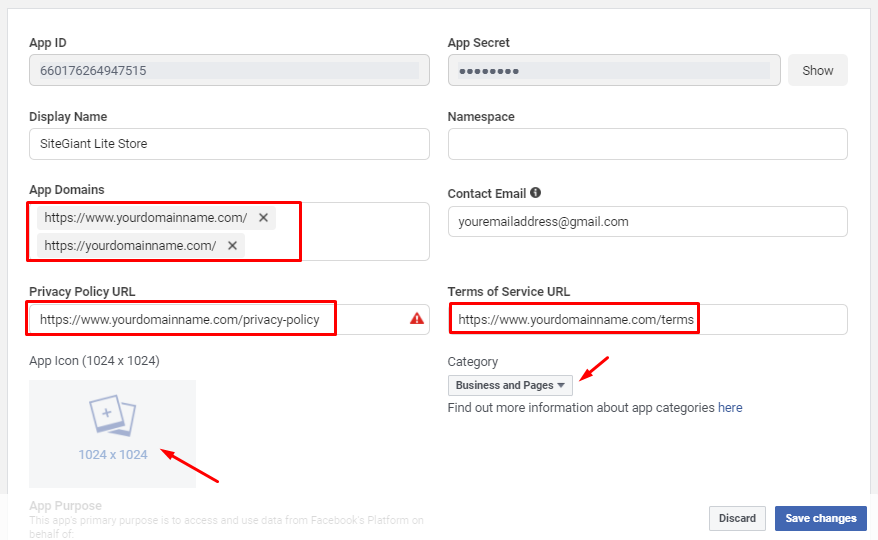
Step 5: Go to the Settings menu and choose Basic.

Step 6: Insert your SiteGiant Lite domain name in the App Domains field.
Step 7: Insert Privacy Policy URL & Terms of Service URL which you can get the URL link from your store menu.
Step 8: Select the Category & App Icon of your online business, then Save Changes.
Set Advanced Access for Permissions and Features #
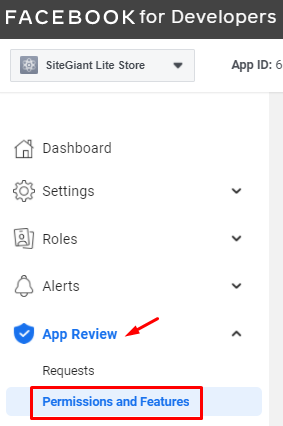
Step 1: From the App Review menu, choose Permissions and Features.
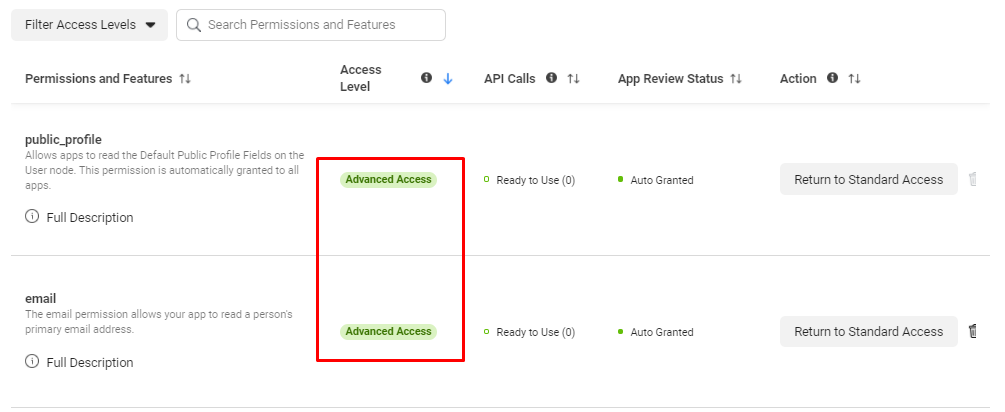
Step 2: Update the Access Level of “public_profile” and “email” to become Advanced Access, by clicking on the Get Advanced Access button at the Action.
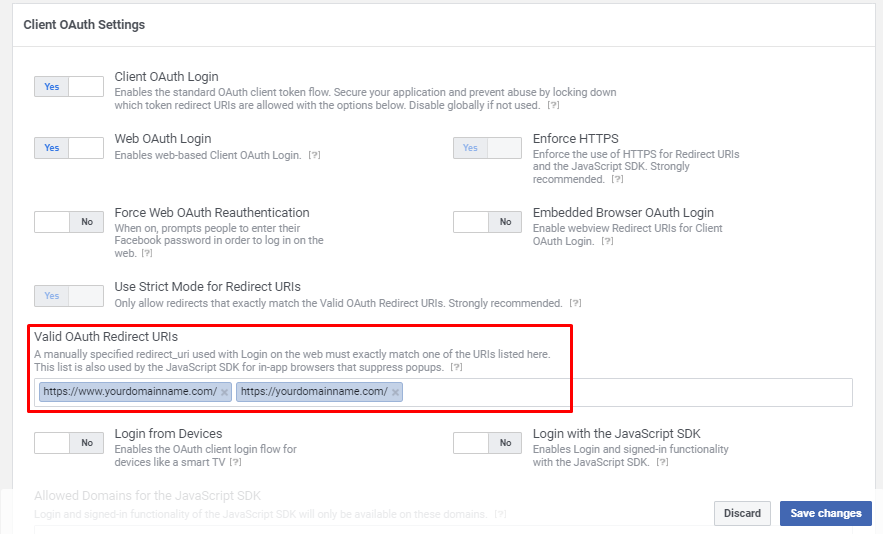
Setup Valid OAuth Redirect URIs #
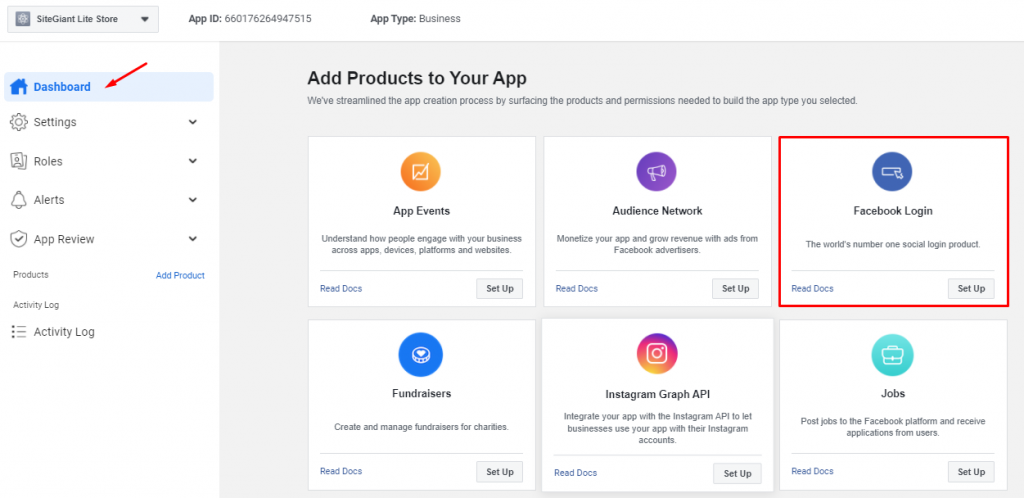
Step 1: Go to Dashboard and click on ‘Set Up’ at Facebook Login.
Note: You may just skip the Quickstart step.
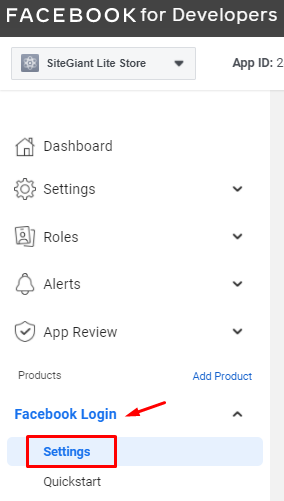
Step 2: Then, you may find the menu Facebook Login at the side, go to ‘Settings‘ directly.
Step 3: Insert your domain name at the Valid OAuth Redirect URIs, and click Save Changes.
Integrate with Facebook Connect #
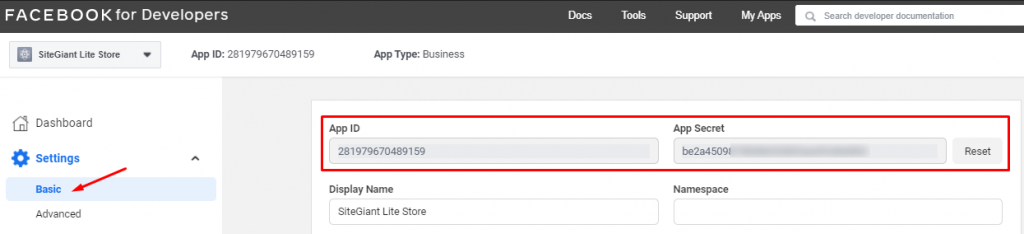
Step 1: Go to the Settings menu and choose Basic.
Step 2: Copy the App ID and App Secret.
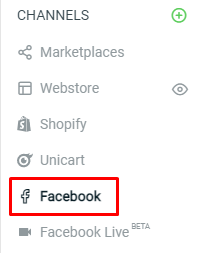
Step 3: Navigate to SiteGiant Lite Dashboard, go to the Facebook menu.
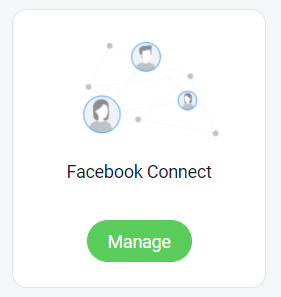
Step 4: Click ‘Manage’ at Facebook Connect.
Step 5: Enable the Status, and paste the Facebook App ID and App Secret which copied earlier.
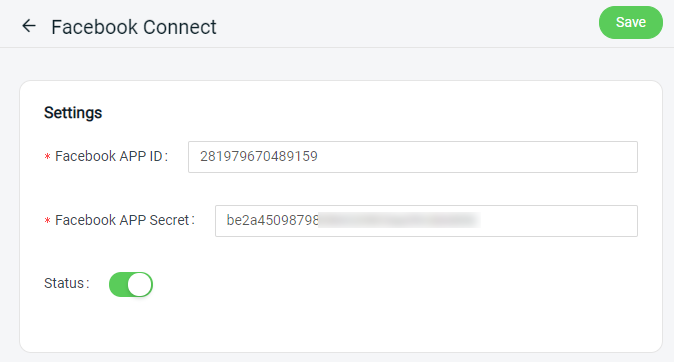
Step 6: Save the settings once done.
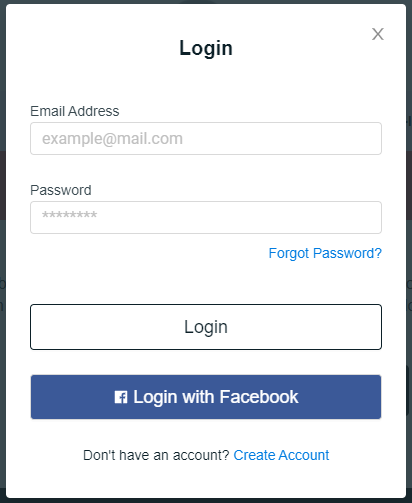
Step 7: Customer is now able to Login with Facebook from your SiteGiant Lite webstore.
For Latest Guide: Click here
Credits: SiteGiant Lite


