How to use Carrier Manifest #
Add Carrier Manifest #
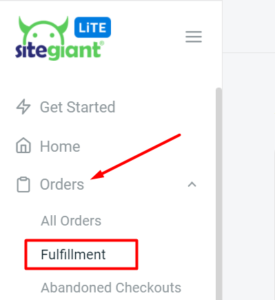
Step 1: Navigate to Orders > Fulfillment on the menu dashboard.
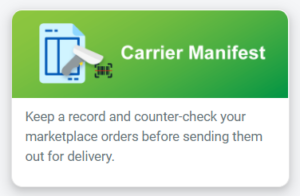
Step 2: Click on Carrier Manifest.
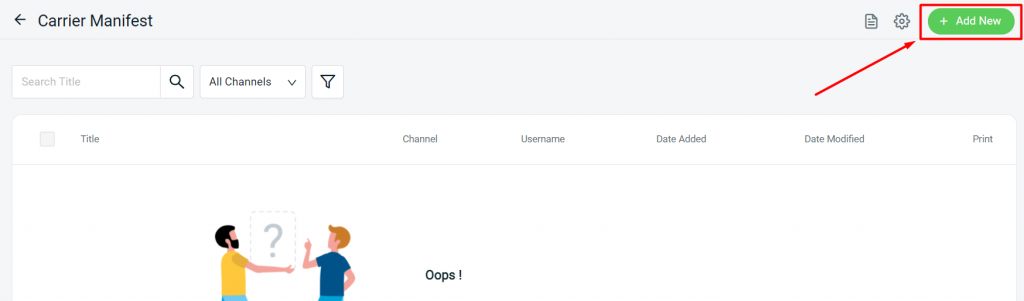
Step 3: Then, click on ‘Add’ to create a Carrier Manifest.
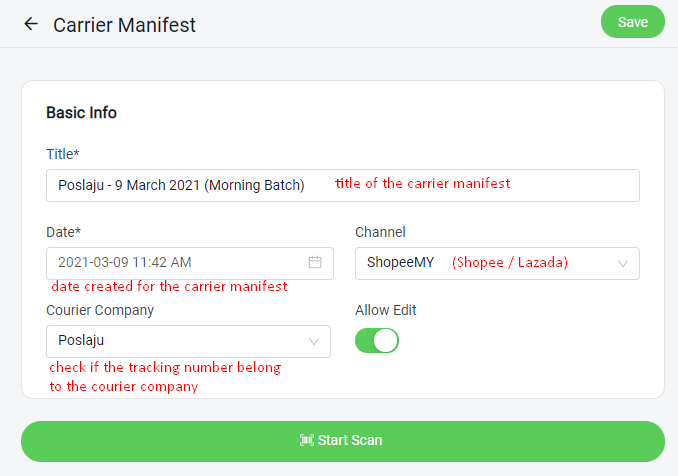
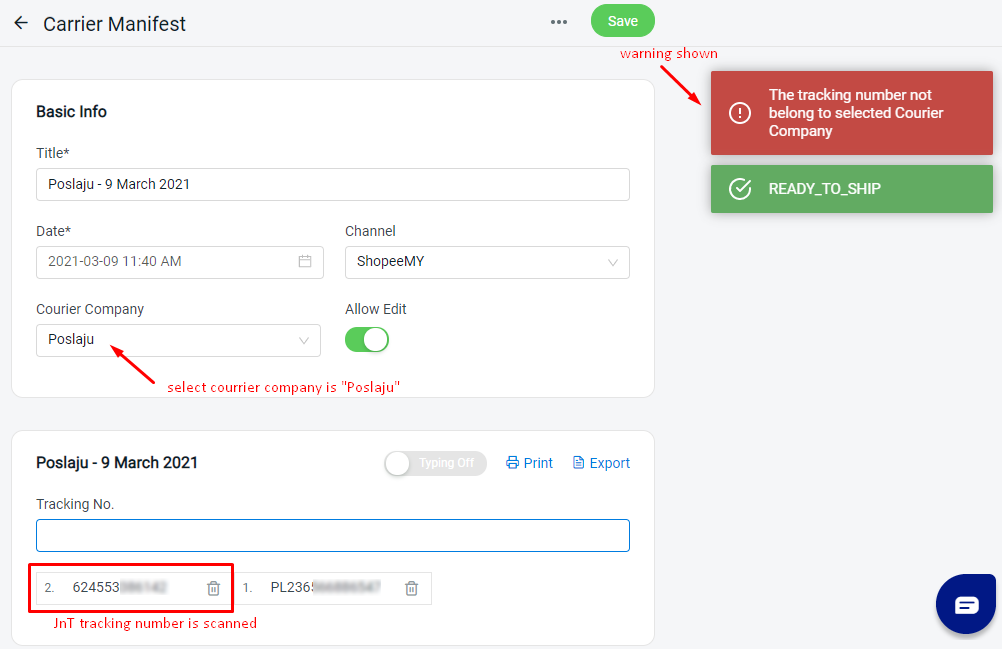
Step 4: Fill in the Title and select the Channel (e.g. Shopee) accordingly. The ‘Courier Company’ is optional to choose, it depends on if you wish to check the parcels based on the courier.
Scan Shipping Label #
Step 1: To start scanning your Shipping Labels, click on ‘Start Scan’.

Step 2: The following section will appear and you may start to scan your Shipping Label barcodes.
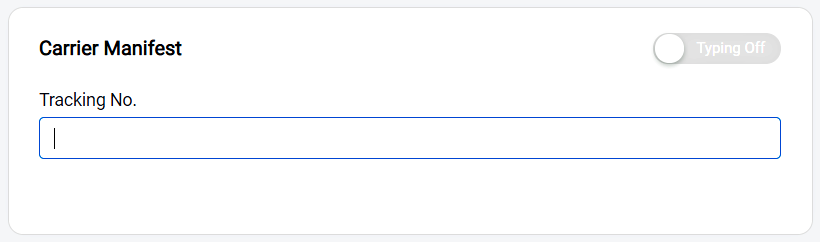
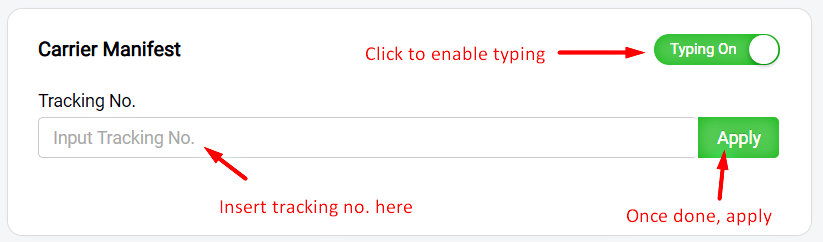
Note: If you do not have a barcode scanner and would like to type out the tracking no. instead, you may enable the typing function as below.
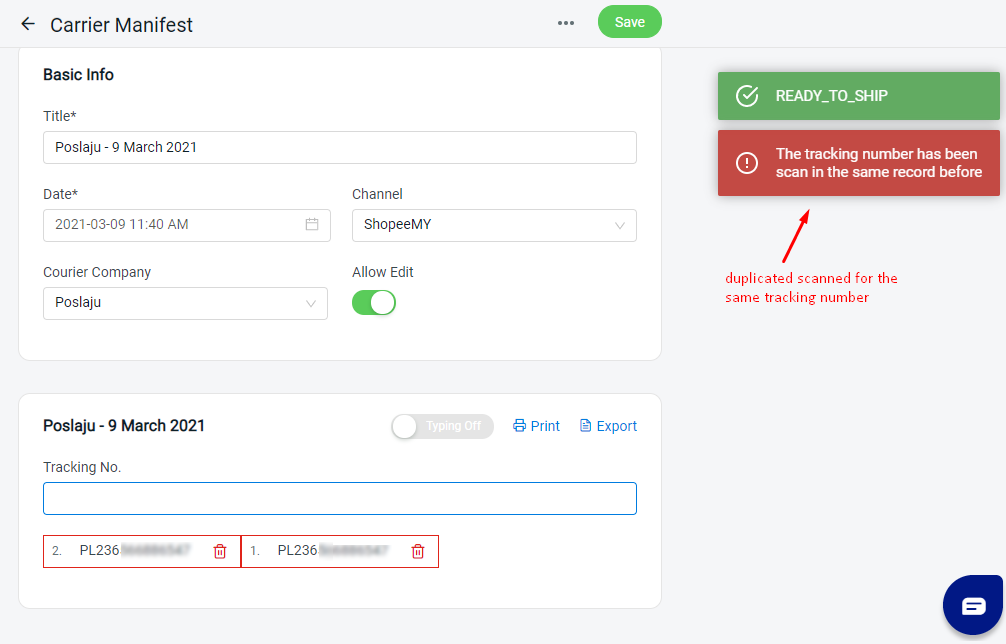
Step 3: As you scan/type in your Shipping Label, the tracking number of your Order will be listed and the status of your Order will be displayed.

Step 4: When the Order is scanned twice or more, a notification will pop up will inform you of duplicated Order.
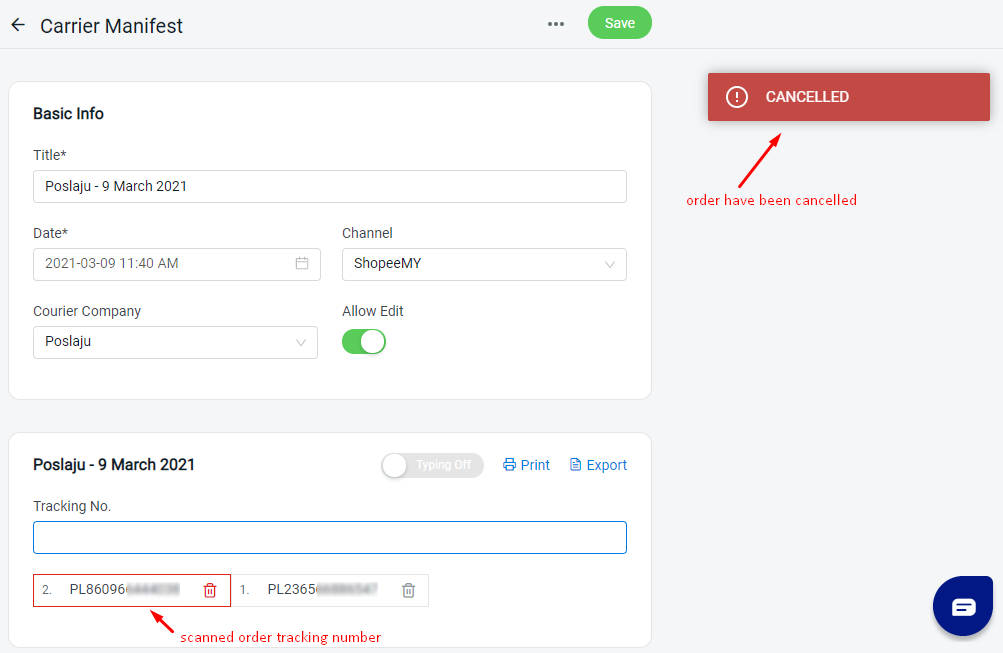
Step 5: If the order has already been cancelled, the following status will pop up.
Step 6: If the tracking number scanned does not belong to courier company selected, then the system will prompt an error warning message.
Step 7: Once you have finished scanning all your Shipping Labels, click on ‘Save’.

Print Carrier Manifest #
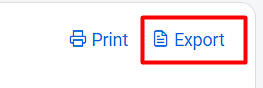
Step 1: The Print option will appear after you Save your list.

Step 2: You may also export the Carrier Manifest in CSV format by clicking on ‘Export’.
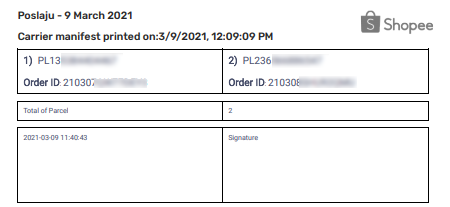
Step 3: The Date Printed and the Total of Parcel for the carrier manifest will be displayed for record and checking purpose.
For Latest Guide: Click here
Credits: SiteGiant Lite


